Best practices for integrating Kaseya modules
Kaseya integrations link your modules together to automate and streamline the common workflows you perform every day, leaving you with more time to focus on running a profitable business.
This best practices guide highlights key Kaseya functionality to help you easily and conveniently manage your integrations, a few handy Kaseya automations tailored to common business needs, and tips for ensuring seamless connections between your modules.
Manage your integrations through KaseyaOne
KaseyaOne Unified Login
Start by integrating all your Kaseya modules with KaseyaOne Unified Login, which allows you and your team to log in to modules directly from KaseyaOne. Each of your users needs to remember only one set of credentials to securely log in to all the modules you own.
With this feature enabled, you can leverage additional time-saving features:
- Require Log In with KaseyaOne: Requires users to log in to modules with KaseyaOne Unified Login.
- Automatic User Provisioning and Automatic User Deprovisioning: Automates new user creation and removal.
- Access Groups (role-based access control): Allows you to define mapping rules between KaseyaOne groups and module permissions to control user access.
After enabling Unified Login, you'll be able to open Kaseya modules from the following locations in KaseyaOne:
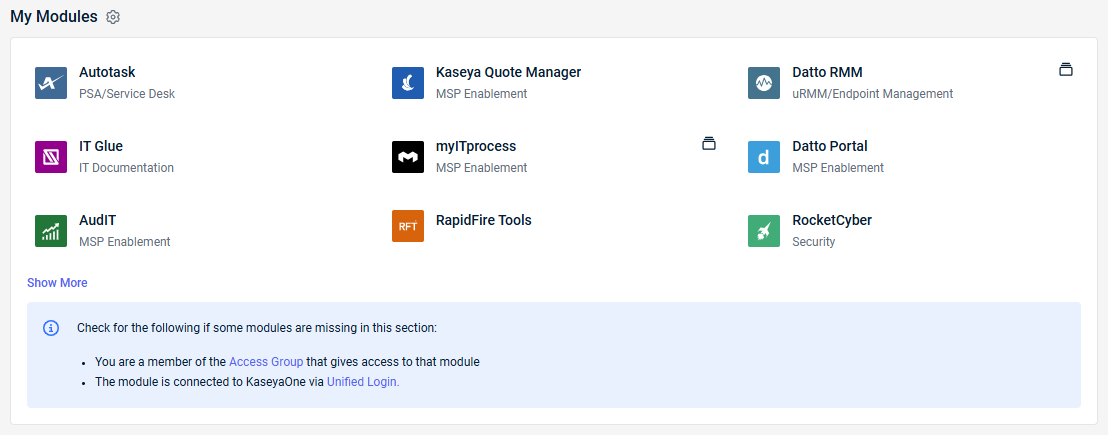
- My Modules widget on the home page dashboard
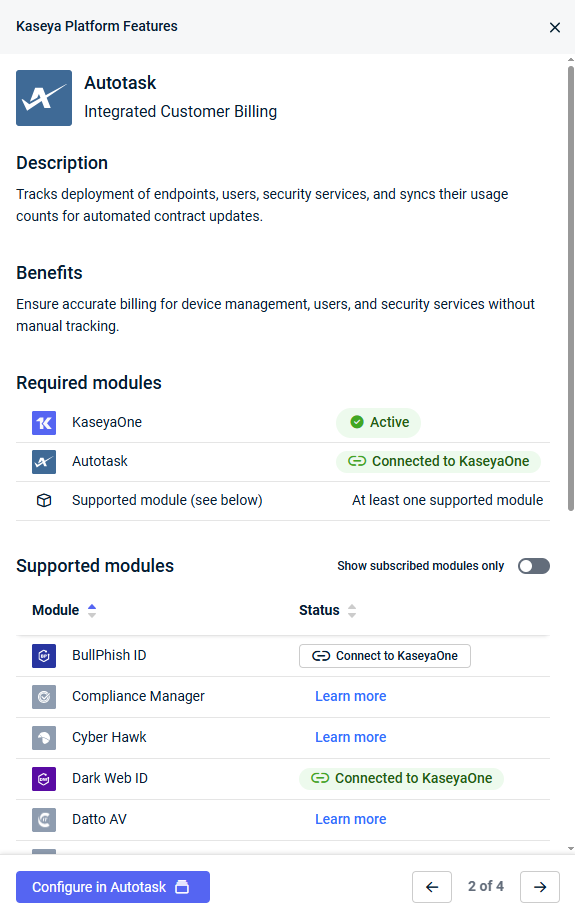
- Automation Center detail panes
- App Launcher in the upper-right corner of the header
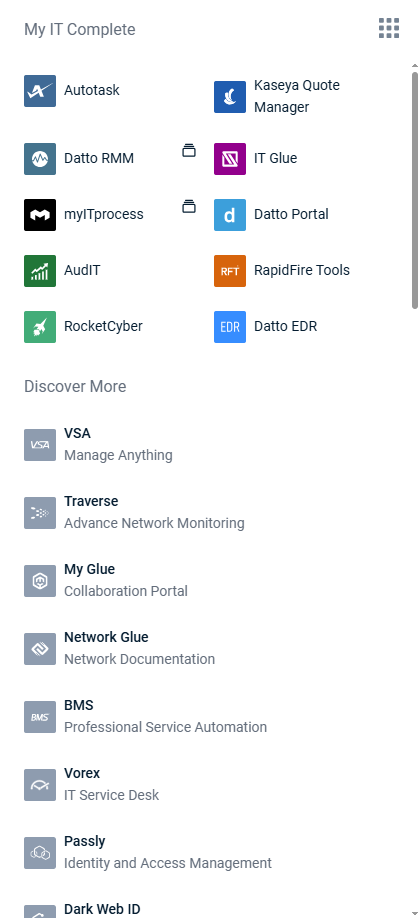
NOTE The App Launcher is also available in Kaseya modules with Unified Login enabled.
To get started with Unified Login functionality in each module, refer to Enable Log In with KaseyaOne.
Automation Center
As a single page in KaseyaOne, the Automation Center streamlines your ability to discover integrations and automations across all Kaseya modules and supported third-party applications.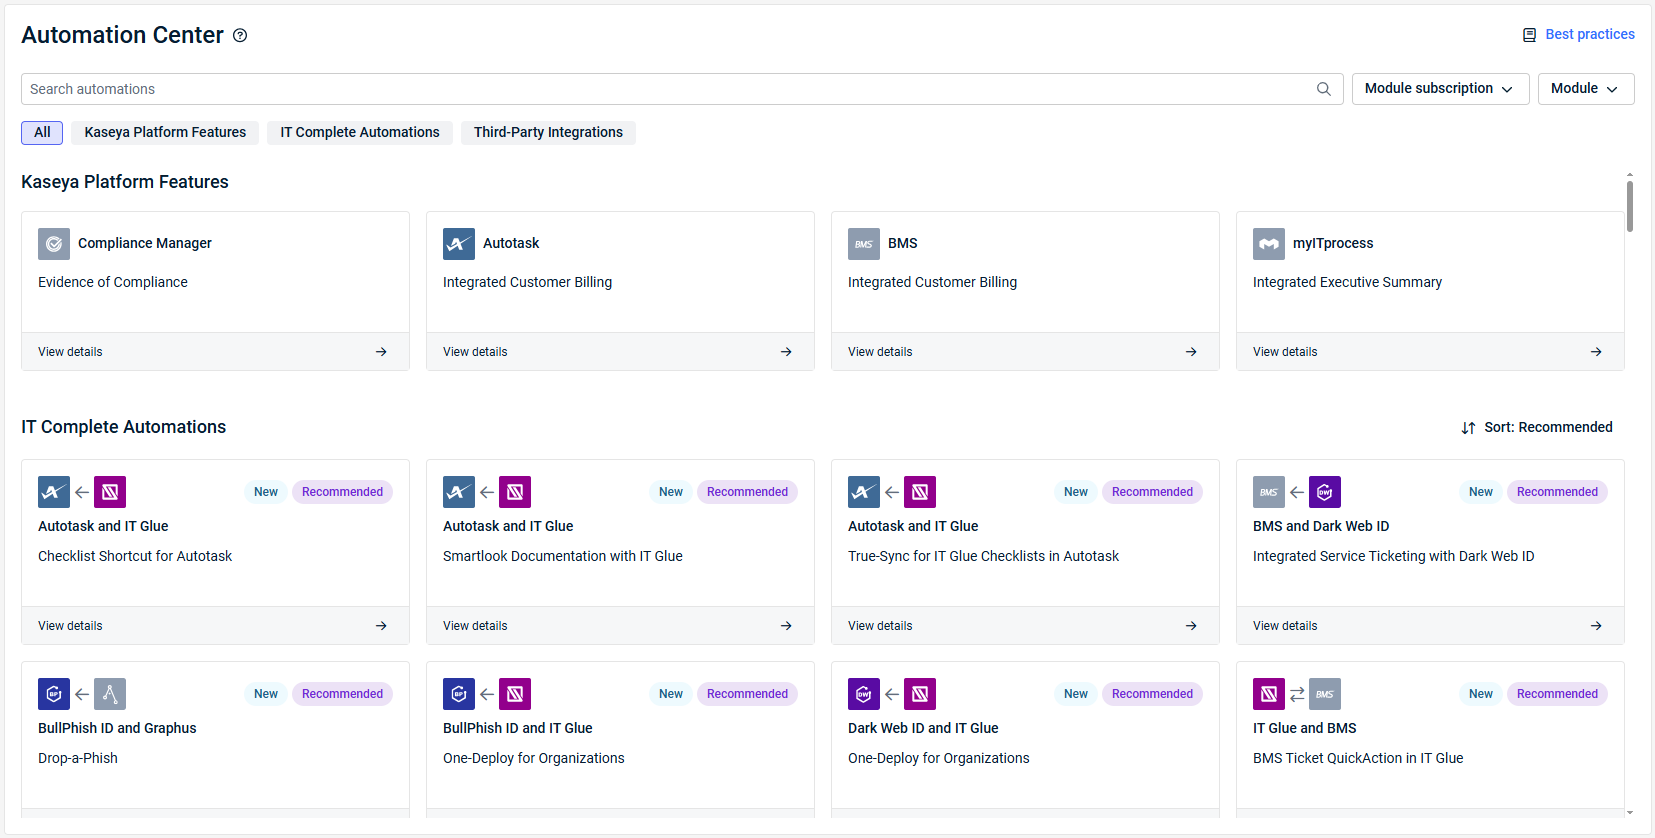
This centralized hub offers the following key features:
- Easy-to-navigate visibility of all Kaseya platform features, module integrations and automations, and third-party integrations.
- Subscription-based filtering and search functionality to quickly surface the workflows you want to set up, use, or learn more about.
- The ability to view the details of each available integration and automation and open the integration setup pages from KaseyaOne.
To get started, click Automation Center from the left navigation menu in KaseyaOne.
Let Cooper AI work for you
Cooper insights
Powered by our Cooper Intelligence Engine, Cooper insights reveal the results of a deep analysis of your usage of Kaseya modules and tell you exactly what actions to take to fix any problems or improve workflows.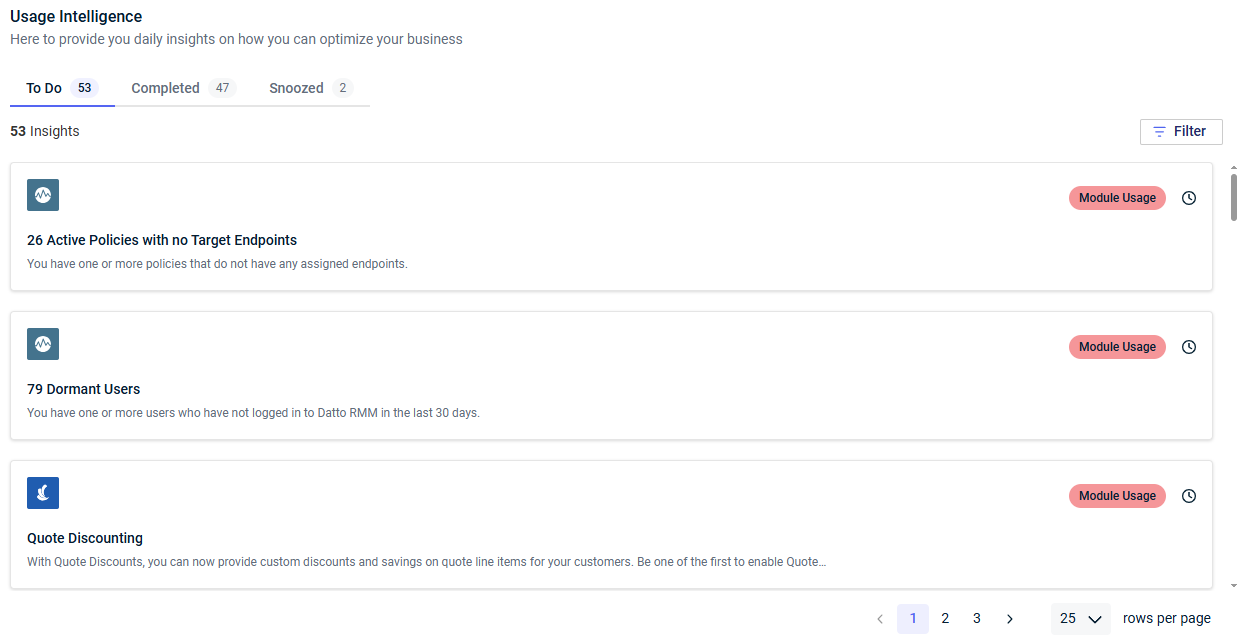
To get started, click Cooper from the left navigation menu in KaseyaOne.
Cooper Bots
Cooper Bots is a powerful Business Process Automation engine that automates manual and repetitive tasks across your Kaseya modules. A Cooper Bot is an event that triggers or is triggered by an event in another Kaseya module. Examples include the following:
- Running internet connectivity analysis when an end user creates a ticket about slow internet.
- Automatically rotating passwords in Active Directory in Network Glue when an end user creates a ticket about a forgotten password.
To get started, click Cooper from the left navigation menu in KaseyaOne, and navigate to the Cooper Bots tab.
Leverage the highest-impact automations
Each Kaseya workflow automation is powered by a standalone integration between two modules: a home module and a supporting module. Each integration powers one or more individual automations.
Explore the automations that can help fulfill the needs of your business and leverage them from the Automation Center:
 Maintain data consistency
- True-Sync and Smart Relate: A number of integrations automatically map and match your records across modules (for example, organizations, devices, contacts, and more) to ensure seamless data management and prevent you from dealing with duplicate records.
- Data Collection Automation: Leverage VSA 9 Agent Procedures to collect and update data used by Compliance Manager.
 Improve your billing
- Integrated Customer Billing: This platform feature is available for a number of Kaseya modules. Hosted through your PSA, either Autotask or BMS, Integrated Customer Billing tracks the deployment of module endpoints, users, and security services and syncs their usage counts for automated contract updates.
- Flexible Asset Billing with IT Glue: Bill IT Glue flexible assets directly from BMS, automating license and Microsoft 365 billing without manual reconciliation.
 Seamlessly manage tickets
- BMS Ticket QuickAction in IT Glue: Work on tickets out of your preferred tool, whether in BMS or IT Glue, for faster resolution times.
- Checklist Shortcut for Autotask or BMS: Generate a checklist in a PSA ticket from an IT Glue checklist template.
- SmartLook Documentation with IT Glue: Surface contextual documents, passwords, and flexible assets from IT Glue as insights in PSA tickets.
 Get ahead of credentials breaches
- Integrated Service Ticketing with Dark Web ID: Available for Autotask and BMS, this automation generates PSA tickets from Dark Web ID alerts for proactive credential breach management.
- True-Sync Dark Web Credentials Monitoring: Available for Spanning for Google Workspace and Spanning for Microsoft 365, this automation allows you to view compromised credentials from the dark web associated with your Google Workspace domain or Microsoft 365 tenant.
Make your integrations run smoothly
Integrating modules to enable automations across your entire stack requires a lot of connections. To keep things running smoothly, you'll want to keep some things in mind to ensure your modules integrate successfully and your automations run flawlessly.
As follows are the key best practices for producing seamless integrations and preventing data sync complications:
- Standardize data: Establish consistent naming conventions and processes across all your integrated modules to help the systems achieve seamless data matching and prevent record duplication.
- Phase implementation: Adopt and onboard solutions incrementally rather than all at once, and direct questions to your implementation consultant and account manager.
- Assign adequate user permissions: Thoughtfully assign roles/security levels to your team members to ensure they have access to only what is relevant to their job function. Determine which users need to manage settings, create data, edit data, or only view data, and then grant access accordingly. Granularly granting or restricting access using custom roles/security levels may be advantageous.
- Train your staff thoroughly: Ensure your team members understand how data flows between systems. For quick and easy identification, reference the data flow arrows in Automation Center cards. Refer to Data flow arrows.
- Review integrations regularly: Most integrations sync data automatically and frequently. Check the synchronization status between modules often using sync logs, and act on any discrepancies.
- Leverage documentation: Review Kaseya documentation and create and maintain your own process documentation for each integration point.
Helpful hints
- A handful of Kaseya modules, including Kaseya MDR, RocketCyber, BMS, Autotask, and Datto RMM, have overlapping ticketing and alerting options, which can cause system administrators to receive duplicate notifications if not properly configured.
- Your ransomware component is powered by Datto EDR when using Kaseya 365 Endpoint. Do not use standalone Datto RMM ransomware detection after purchasing Kaseya 365 Endpoint. Refer to Understanding Datto EDR's ransomware detection in the Datto EDR Help system.
- Integrating Autotask, Datto RMM, and IT Glue is a great way to combine the monitoring of Datto RMM, the ticketing and customer management of Autotask, and the content and password management of IT Glue. With these three systems integrated, you'll be able to easily synchronize customer and device data, access assets like stored passwords in IT Glue while remoting into devices in Datto RMM, and surface IT Glue documents when reviewing tickets in Autotask. Refer to Integrating Autotask, Datto RMM, and IT Glue for detailed instructions and best practices on setting up this powerful integration.
EXAMPLE You don't want to integrate Datto EDR with Autotask if you have RocketCyber. Instead, integrate RocketCyber with Autotask. If you are using Datto EDR, refer to Best practices for integration in the Datto EDR Help system before you begin your integration journey.


