Access Groups (role-based access control)
PERMISSIONS In respective module: Master, Superuser, Administrator, Global Administrator, Security Admin (Datto Partner Portal)
Instructions follow on how to set up role-based access control (RBAC) for a module. You do this by defining mapping rules between KaseyaOne groups and module roles (or security levels) to control user access. The purpose of defining mapping rules is to mimic or maintain the same levels of user access between KaseyaOne and the module. You set up RBAC for a module by configuring Access Groups from within the individual module.
-
If you enable Access Groups, then RBAC from KaseyaOne will be allowed for the module and you will be able define mapping rules (by mapping KaseyaOne groups to the same or similar module roles) to control user access.
-
If you disable Access Groups, then RBAC from KaseyaOne will not be allowed for the module.
NOTE RBAC is the process of assigning permissions to users based on their role within an organization. But rather than assigning permissions to users individually, you assign permissions to a group (and then assign users to the group). Refer to Manage groups.
Enable Access Groups from individual modules
Instructions to configure Access Groups from individual modules follow.
Please refer to your module documentation and module release notes for more information.
To enable Access Groups for Autotask, do the following:
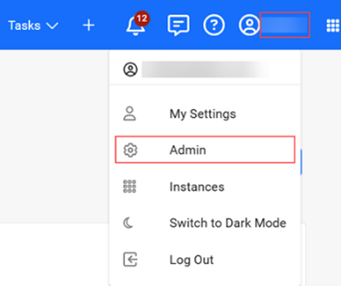
- Open Left Navigation Menu > Admin > Extensions & Integrations > Kaseya Integrations > KaseyaOne.
- On the KaseyaOne Settings page, select Enable Log In with KaseyaOne.
- Under User Exceptions, begin typing a user's name or use the data selector and select the users who will be exempt from the Require Log In with KaseyaOne condition, if enabled. Enter the URL that exempt users will use.
- Navigate to KaseyaOne Configuration Settings. The exact location will differ depending on the module.
- In the Access Groups section, turn on the Enable Access Groups toggle to enable the feature.
- Create mapping rules (or access groups) to control user access:
- Click Add Access Group to create a new KaseyaOne Group-to-[Module] Role mapping.
- Map each KaseyaOne Group to the same or a similar [Module] Role.
- You can map more than one module role to a KaseyaOne group.
For more information, refer to KaseyaOne integration for Autotask in the Autotask Help.
To enable Access Groups for BMS/Vorex, do the following:
-
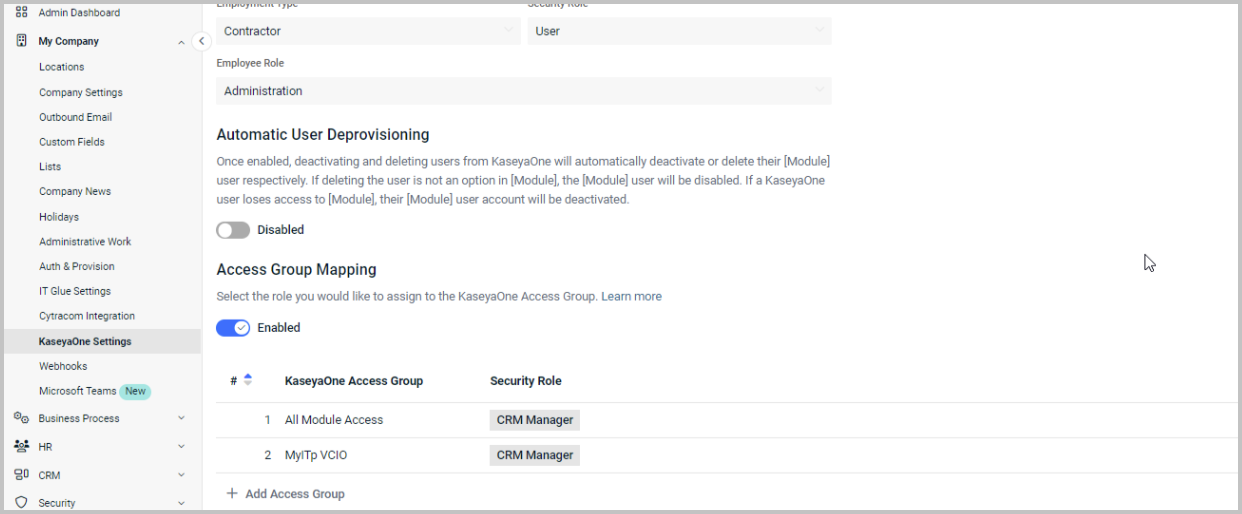
Log in to BMS in the usual way and from the home page, navigate to Admin > My Company > KaseyaOne Settings.
-
Turn on the toggle under Access Group Mapping to enable the feature.
-
Create mapping rules to control user access as follows:
-
Click Add Access Group to create a new KaseyaOne Access Group-to-BMS/Vorex Security Role mapping.
-
Map each KaseyaOne Access Group to the same or a similar BMS/Vorex Security Role.
-
You can map more than one security role to a KaseyaOne group.
-
-
Click Save.
For more information, refer to KaseyaOne Settings: JIT in the BMS/Vorex Help.
To enable Access Groups for ConnectBooster, do the following:
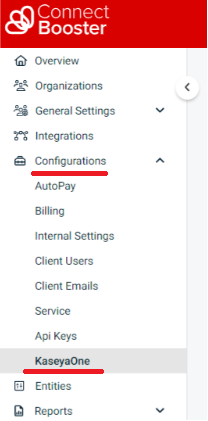
- Log in to ConnectBooster in the usual way and click Configurations > KaseyaOne on the left navigation menu.
-
In the Access Groups section, turn on the Enable Access Groups toggle to enable the feature.

-
Create mapping rules to control user access:
-
Map each KaseyaOne Access Group to the same or a similar [Module] Role.
-
You can map more than one module role to a KaseyaOne group.
-
-
Click Save.
For more information, refer to Associate your ConnectBooster and KaseyaOne Accounts in the ConnectBooster Help.
To enable Access Groups for Datto EDR, do the following:
-
Log into Datto EDR.
-
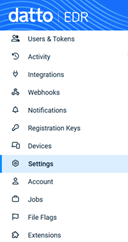
On the Settings page, click the KaseyaOne tab. Verify Log In with KaseyaOne is turned on.

For more information, refer to Integrating with KaseyaOne in the Datto EDR Help.
IMPORTANT Before enabling this feature, make sure that your KaseyaOne groups are assigned the Datto RMM module and that you have created new or renamed existing Datto RMM security levels to match the KaseyaOne group names (names are case insensitive) and level of user access.
To enable Access Groups for Datto RMM, do the following:
-
Log in to Datto RMM in the usual way and navigate to Setup > Integrations > KaseyaOne.
-
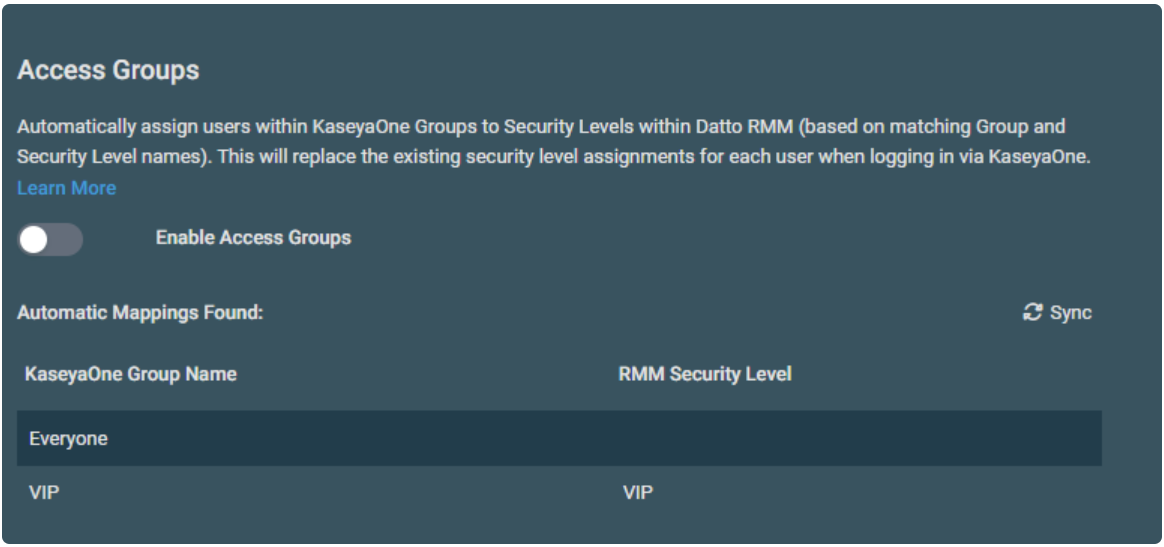
Review the mapping rules in the Access Groups section under Automatic Mappings Found:
-
Review the KaseyaOne group-to-Datto RMM security level mappings to make sure they are what you want. For example, each KaseyaOne group should map to a Datto RMM security level that has the same or similar level of user access.
-
Click Sync to confirm all groups match to the intended Datto RMM security level.
-
If the mappings match as expected, then proceed to the next step.
-
-
Turn on the Enable Access Groups toggle to enable the feature.
For more information, refer to Unified Login with KaseyaOne in the Datto RMM Help.
NOTE All RapidFire modules (Compliance Manager, Cyber Hawk, Network Detective Pro, VulScan), although purchased individually, are accessed from the RapidFire Tools portal. After Unified Login is enabled for the RapidFire Tools portal, each module can be accessed through Log In with KaseyaOne.
To enable Access Groups for Rapid Fire Tools, do the following:
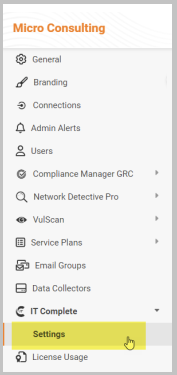
- In the RapidFire Tools portal, click IT Complete > Settings on the left navigation menu.
- In the Access Groups section, turn on the Enable Access Groups toggle to enable the feature.

-
Create mapping rules to control user access:
-
Click Add Access Group to create a new KaseyaOne Access Group-to-RapidFire Tools Portal Role mapping. Map KaseyaOne access group to the same or a similar role in Rapid Fire Tools.
-
Map each KaseyaOne Access Group to a specific Global Access Level in Rapid Fire Tools.
-
For Site Restricted users:
- Select a site (from the Site(s) drop-down) to which the Group will have access.
- Likewise, select a site role (from the Site Role drop-down).
-
For more information, refer to Rapid Fire Tools Help.
To enable Enable Access Groups for VSA 10, do the following:
NOTE A prerequisite to enabling this feature is to enable Unified Login with KaseyaOne — refer to Enable Log In with KaseyaOne for VSA 10.
- Log in to VSA 10 in the usual way.
- Navigate to Administration > Configuration > Settings on the left navigation menu and select KaseyaOne Log In Settings.
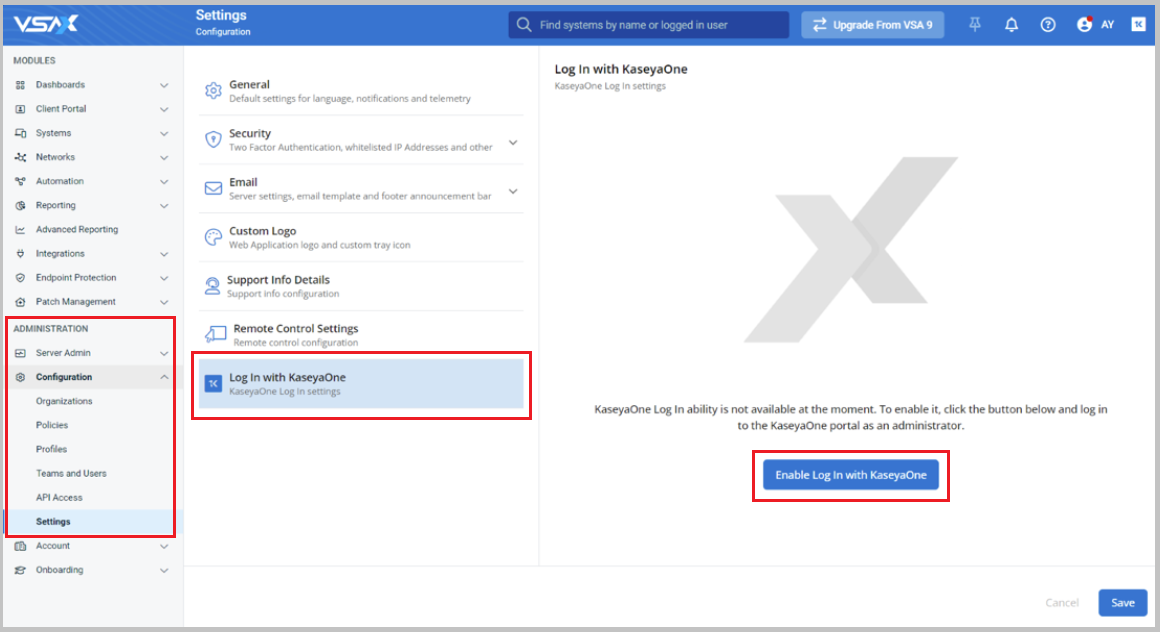
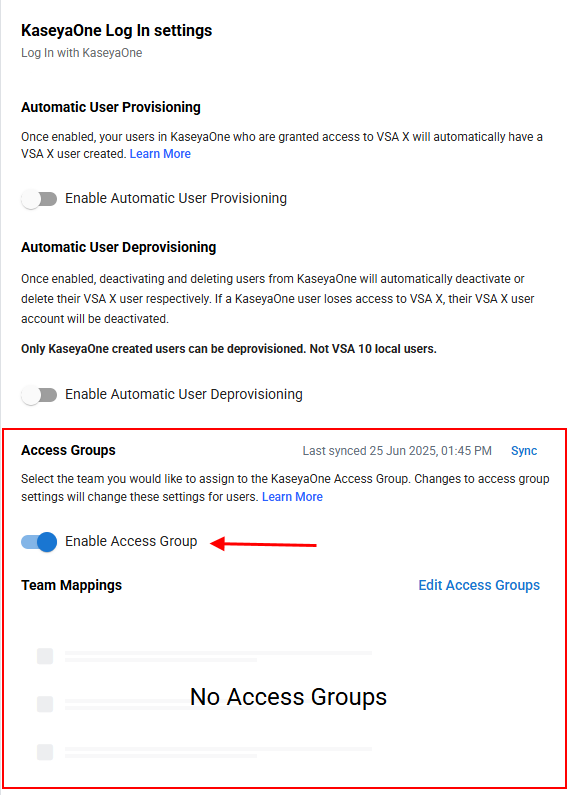
- Under Access Groups, turn on the Enable Access Groups toggle.
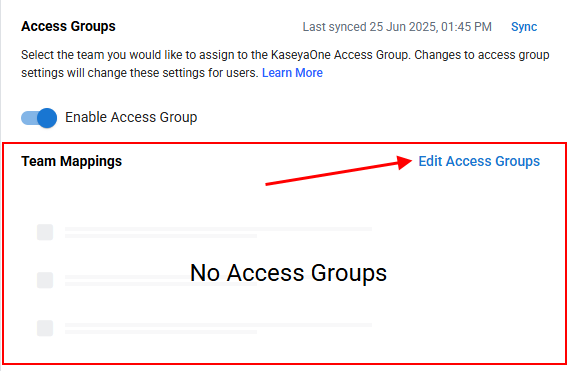
- In Team Mappings, click Edit Access Groups.
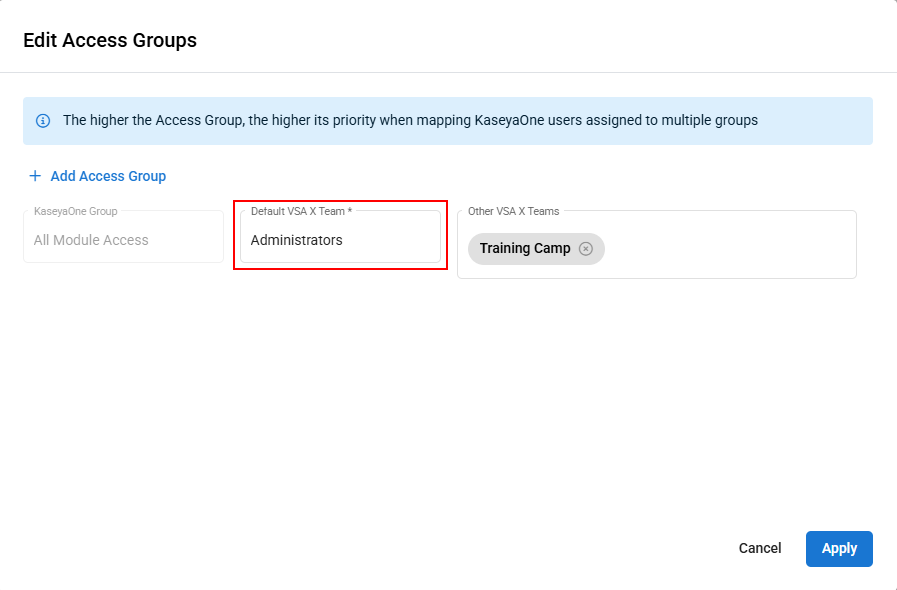
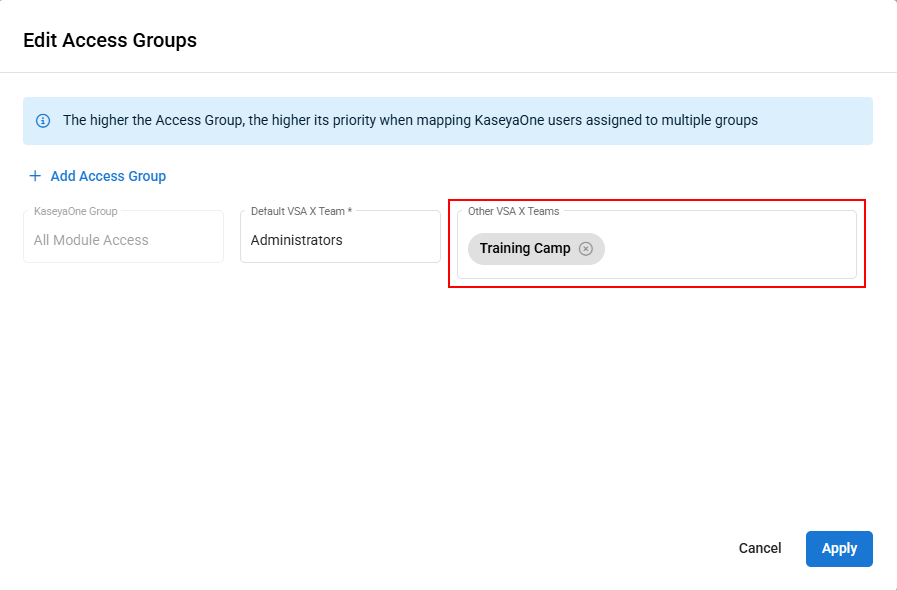
- In the Edit Access Groups window, map each existing KaseyaOne access group to the same or a similar VSA 10 team in the Default VSA X Team field.
NOTE By default, the All Module Access KaseyaOne access group is selected for configuration. To configure additional KaseyaOne access group mappings, click + Add Access Group and choose which group you want to configure mapping rules for.

-
Click Apply and review the mappings.
- Click Save.
For more information, refer to Unified Login with KaseyaOne in the VSA 10 Help.
