Automatic User Provisioning
PERMISSIONS In respective module: Superuser, Administrator, Global Administrator, Security Admin (Datto Partner Portal)
Instructions follow on how to set up just-in-time user provisioning for a module. You set up just-in-time user provisioning for a module by configuring Automatic User Provisioning from within the individual module.
-
If you enable Automatic User Provisioning, then just-in-time provisioning will be allowed for the module where module user accounts will be created automatically with a specified default role whenever new KaseyaOne users are granted access to the module.
-
If you disable Automatic User Provisioning, then new KaseyaOne users must ask their administrator to create a module user account for them with the required role after they are granted access to the module.
Enable Automatic User Provisioning from individual modules
Instructions to configure Automatic User Provisioning from individual modules follow.
NOTE For INKY, Automatic User Provisioning is enabled automatically and there is no manual procedure for enabling this feature.
Please refer to your module documentation and module release notes for more information.
To enable Automatic User Provisioning for Autotask, do the following:
- Open Left Navigation Menu > Admin > Extensions & Integrations > Kaseya Integrations > KaseyaOne.
- On the KaseyaOne Settings page, select Enable Automatic User Creation to enable the feature.
- Click the drop-down arrows for each required field and select a default to assign to new KaseyaOne users. For security reasons, select a lower level of access as the default Security Level.
For more information, refer to KaseyaOne integration for Autotask in the Autotask Help.
To enable Automatic User Provisioning for BMS/Vorex, do the following:
- Log in to BMS in the usual way and from the home page, navigate Admin > My
Company > KaseyaOne Settings.
- Turn on the toggle under Automatic User Creation to enable the feature.

- Under Employee Defaults, select the default Department, Location, Manager, Job Title, Employment Type, Security Role, and Employee Role to assign to new KaseyaOne users.
- Click Save.
For more information, refer to KaseyaOne Settings: JIT in the BMS/Vorex Help.
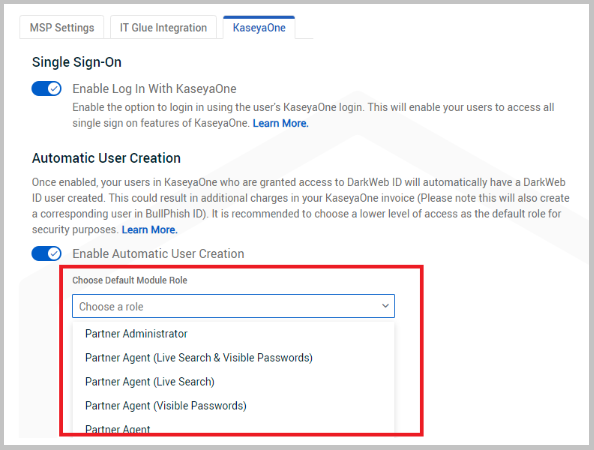
To enable Automatic User Provisioning for BullPhish ID, do the following:
- Log in to BullPhish ID and on your Organization's dashboard, click Settings. The Settings page opens with the KaseyaOne tab selected. In the Unified Login section, make sure Enable Log In with KaseyaOne is turned on.

- In the Automatic User Creation section, turn on Enable Automatic User Creation.

- Under Default Settings, click the drop-down arrow and select the default BullPhish ID role to assign to new KaseyaOne users. For security reasons, select a lower level of access as the default role.
For more information, refer to Enabling automatic user creation in the BullPhish ID Help.
To enable Automatic User Provisioning for ConnectBooster, do the following:
- Log in to ConnectBooster and click Configurations > KaseyaOne on the left navigation menu.
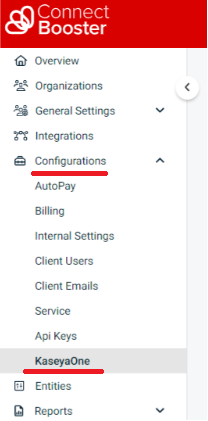
- In the Automatic User Provisioning section, turn on the Enable Automatic User Provisioning.

- Under Default Settings, click the Role drop-down arrow and select the default ConnectBooster role to assign to new KaseyaOne users. For security reasons, select a lower level of access as the default role.
For more information, refer to Associate your ConnectBooster and KaseyaOne Accounts in the ConnectBooster Help.
To enable Automatic User Provisioning for Dark Web ID, do the following:
- Log in to Dark Web ID and navigate to My Account > Organization Settings> KaseyaOne.
- In the Automatic User Creation section, turn on the Enable Automatic User Creation toggle.
- Under Choose Default Module Role, click the drop-down arrow and select the default Dark Web ID role to assign to new KaseyaOne users. For security reasons, select a lower level of access as the default role.
For Datto EDR and Datto AV, no setup is required as Automatic User Provisioning is enabled by default. With this feature, any KaseyOne user from a paired KaseyaOne organization that does not have an EDR/AV account will have one created upon first login. If this account is deleted, it will be automatically recreated upon the next login.
To enable Automatic User Provisioning for Datto Partner Portal, do the following:
-
Log in to the Datto Partner Portal and navigate to Admin > Security Settings.
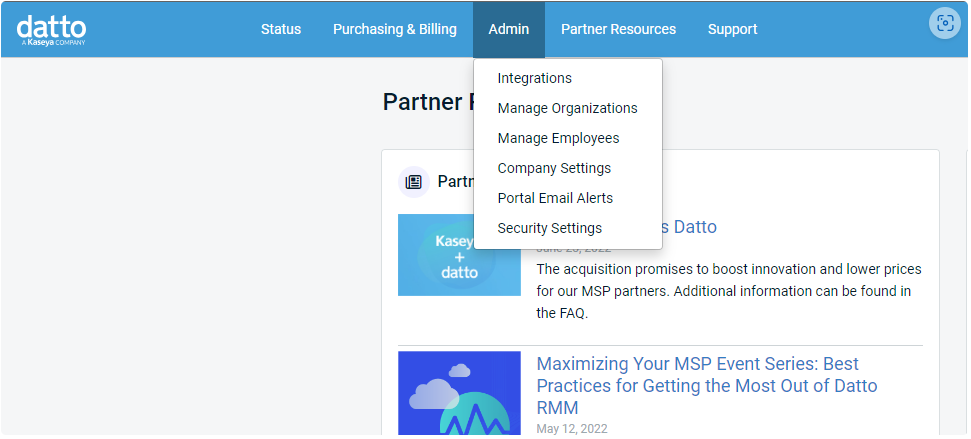
NOTE You must be assigned the Security Admin role to see and access the Security Settings menu.
-
Go to the Single Sign-on (SSO) section of the page that shows the KaseyaOne logo and make sure that KaseyaOne SSO is enabled.
-
In the Automatic User Creation section, turn on the Automatic User Creation toggle to enable the feature.

-
Under Select default role for JIT implementation, click the drop-down arrow and select the default Datto Partner Portal role to assign to new KaseyaOne users. For security reasons, select a lower level of access as the default role.
For more information, refer to KaseyaOne integration with Datto Partner Portal in the Datto Partner Portal Help.
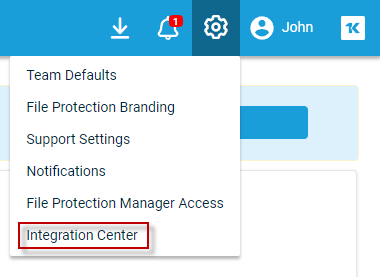
To enable Automatic User Provisioning for Datto File Protection, do the following:
- Log in to Datto File Protection in the usual way.
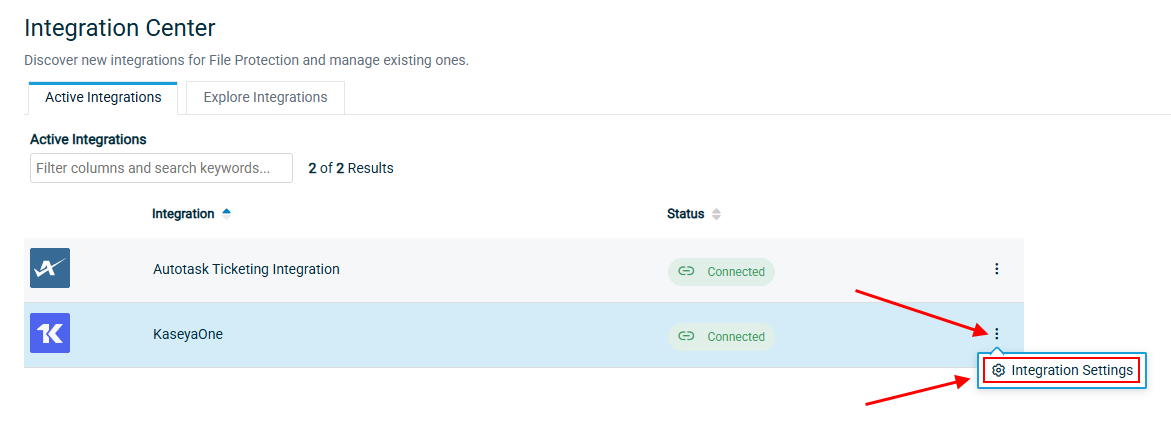
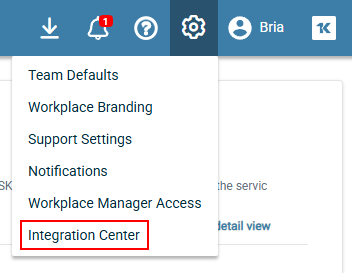
- Go to the Settings menu and select Integration Center.
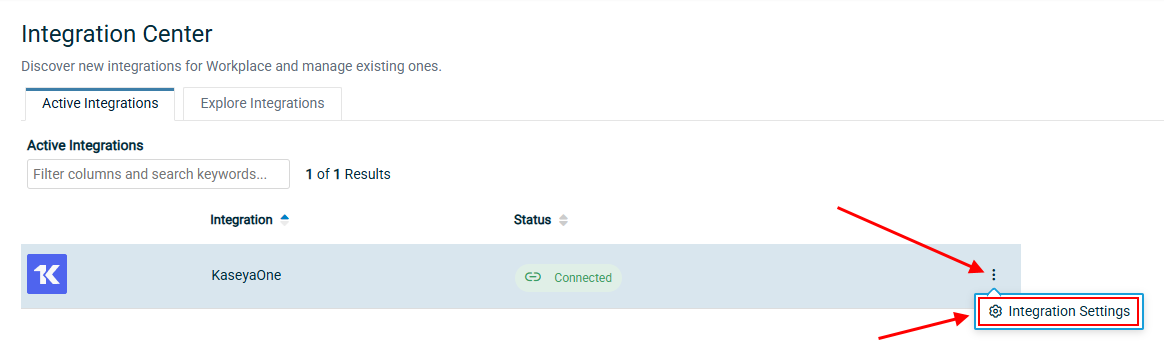
- Go to the Active Integrations tab, click the options menu and select Integration Settings.
- Turn on the Enable Automatic User Provisioning toggle.
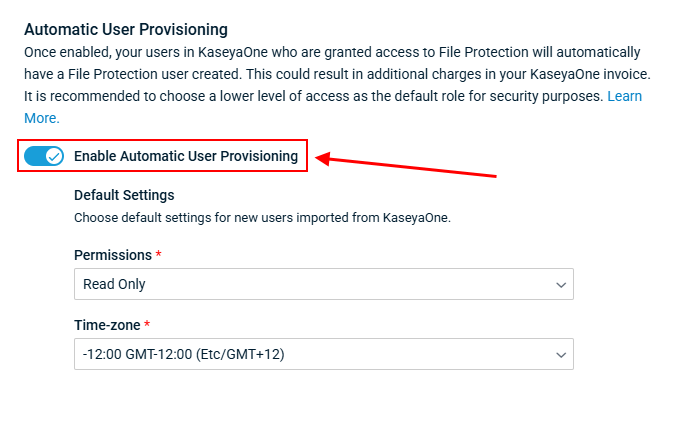
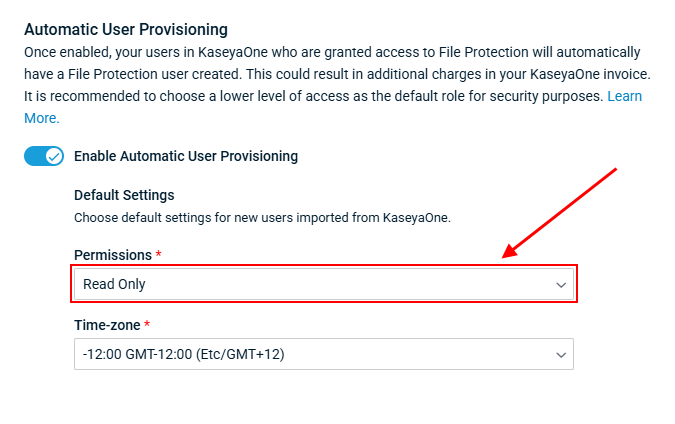
- Under Permissions, select the security level you want users to be provisioned under. It is recommended that a low level of access is given to users that are provisioned automatically for security reasons. The security level of users provisioned this way can be changed after creation.
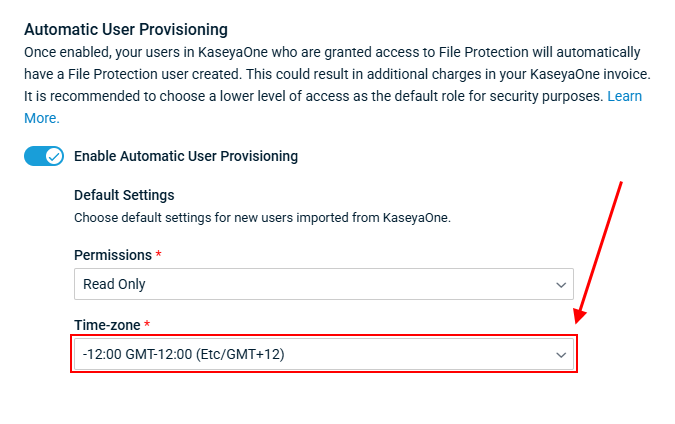
- Under Time-zone, select the time zone you want users to be provisioned under.
- Click Save.
For more information, refer to KaseyaOne Unified Login in the Datto File Protection Manager Help.
To enable Automatic User Provisioning for Datto RMM, do the following:
- Log in to Datto RMM in the usual way and navigate to Setup > Integrations > KaseyaOne.
- Turn on the Enable Automatic User Creation toggle to enable just-in-time provisioning for Datto RMM.

A pop-up message appears informing you that Automatic User Creation will not be enabled until you select a default security level.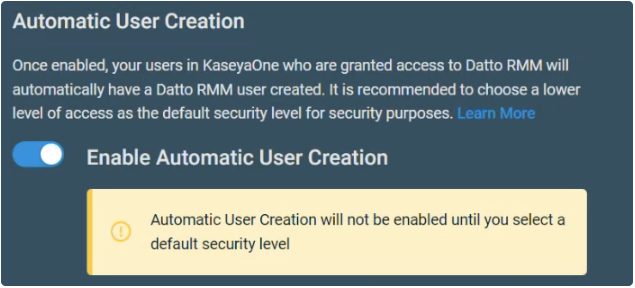
- Under Security Level, click the drop-down arrow and select the default access level to assign to new KaseyaOne users. For security reasons, select a lower level of access as the default.
For more information, refer to Unified Login with KaseyaOne in the Datto RMM Help.
To enable Automatic User Provisioning for Datto Workplace, do the following:
- Log in to Datto File Protection in the usual way.
- Go to the Settings menu and select Integration Center.
- Go to the Active Integrations tab, click the options menu and select Integration Settings.
- Turn on the Enable Automatic User Provisioning toggle.
- Under Permissions, select the security level you want users to be provisioned under. It is recommended that a low level of access is given to users that are provisioned automatically for security reasons. The security level of users provisioned this way can be changed after creation.
- Under Time-zone, select the time zone you want users to be provisioned under.
- Click Save.
For more information, refer to KaseyaOne Unified Login in the Datto Workplace Manager Help.
To enable Automatic User Provisioning for Graphus, do the following:
- Log in to Graphus in the usual way.
- Click MSP Administration on the top menu and then click KaseyaOne on the left navigation menu.
- In the Unified Login section, make sure Enable Log In with KaseyaOne is turned on.
- In the Central User Management section, turn on Enable Automatic User Access.
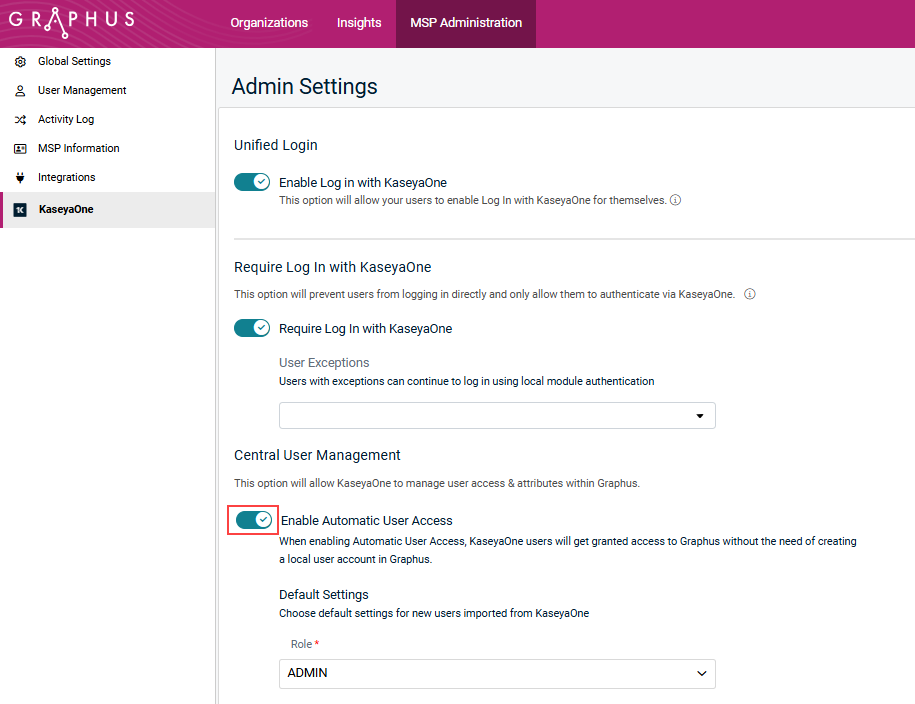
- Under Default Settings, click the drop-down arrow and select the default Graphus role to assign to new KaseyaOne users. For security reasons, select a lower level of access as the default permission.
- Click Save.
For more information, refer to Set up Automatic User Access with KaseyaOne for Graphus in the Graphus Knowledge Base.
NOTE The My Glue and Network Glue modules are add-ons to IT Glue, and you access them from the IT Glue portal. After Unified Login is enabled for the IT Glue portal, each module can be accessed through Log In with KaseyaOne.
To enable Automatic User Provisioning for IT Glue/My Glue/Network Glue, do the following:
- From the IT Glue home page, navigate to Admin> Settings > Authentication.
- Turn on the Enable Automatic User Provisioning toggle in the Automatic User Provisioning section.
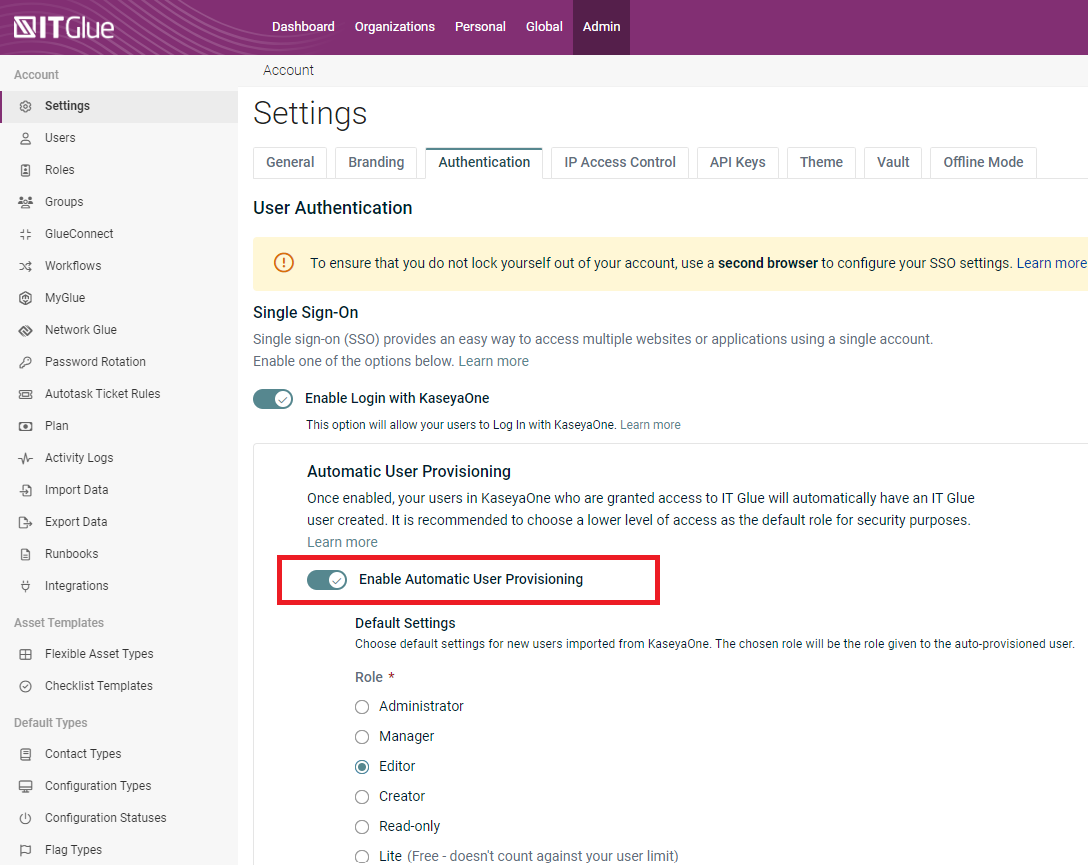
- Under Default Settings, select the default IT Glue role (Editor is selected by default) to assign to new KaseyaOne users. For security reasons, select a lower level of access as the default permission.
For more information, refer to Setting up single sign-on to IT Glue in the IT Glue Help.
To enable Automatic User Provisioning for Kaseya Quote Manager, do the following:
- Log in to Kaseya Quote Manager and navigate to Settings > KaseyaOne.
- In the Automatic User Creation section, turn on the Enable Automatic User Creation toggle.
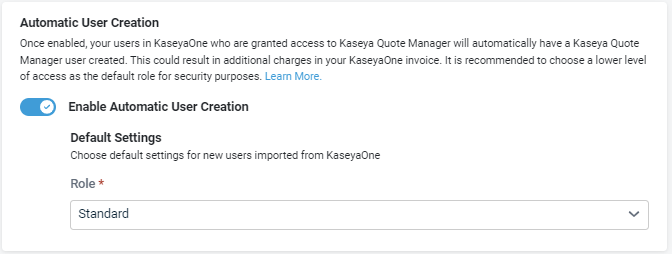
- Under Default Settings, click the drop-down arrow and select the default Kaseya Quote Manager role to assign to new KaseyaOne users. For security reasons, select a lower level of access as the default permission.
For more information, refer to KaseyaOne integration for Kaseya Quote Manager and Kaseya Quote Manager Help.
NOTE All RapidFire modules (Compliance Manager, Cyber Hawk, Network Detective Pro, VulScan), although purchased individually, are accessed from the RapidFire Tools portal. After Unified Login is enabled for the RapidFire Tools portal, each module can be accessed through Log In with KaseyaOne.
To enable Automatic User Provisioning for Powered Services, do the following:
- Log in to RapidFire Tools and click Global Settings on the top menu.
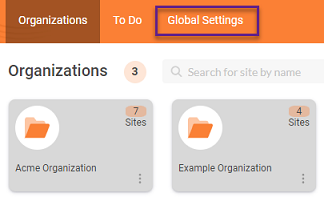
- Navigate to IT Complete > Settings on the left navigation menu.
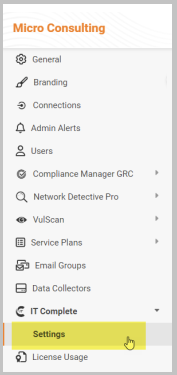
- In the Automatic User Creation section, turn on the Enable Automatic User Creation toggle to enable the feature.
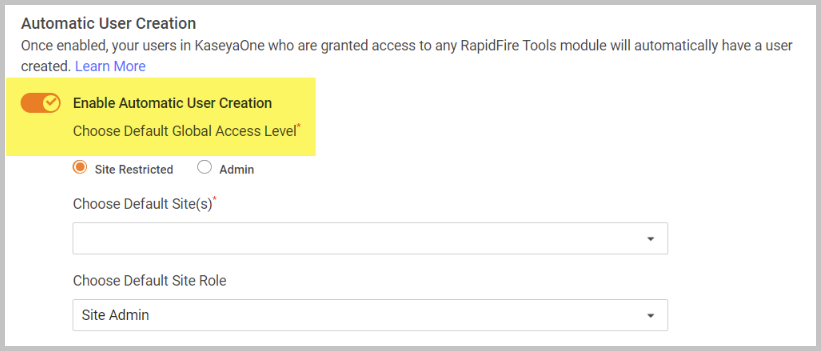
- Under Default Global Access Level, select either Site Restricted or Admin.
Admin users can access all sites and organizations. Site restricted users can only access the Default Sites(s) and organizations they are assigned; they they must also be assigned a Default Site Role. - Click the drop-down arrow and select Default Site(s) to assign to new KaseyaOne users.
- Click the drop-down arrow and select a Default Site Role to assign to new KaseyaOne users.
For more information, refer to Rapid Fire Tools Help.
Automatic user creation allows users to be automatically provisioned in SaaS Alerts when they sign in using KaseyaOne (Unified Login). This removes the need to manually create user accounts and helps ensure access is granted consistently.
Before enabling automatic user creation, ensure the following:
- You are logged in as a SaaS Alerts administrator
- Unified Login with KaseyaOne is enabled
- Users who require access already exist in KaseyaOne
To enable Automatic User Provisioning for SaaS Alerts, do the following:
- Log in to SaaS Alerts as an administrator.
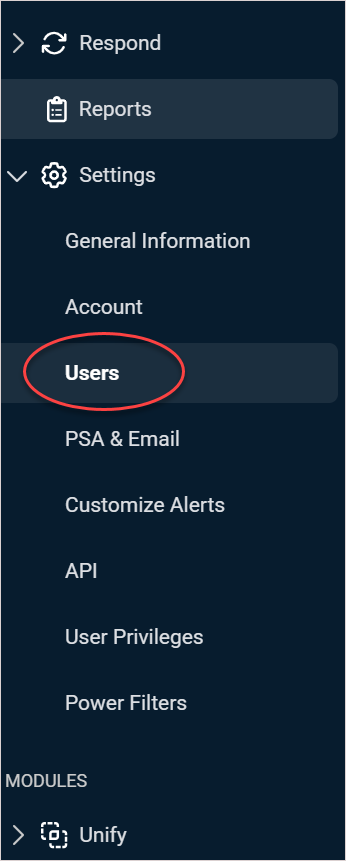
- In the left navigation menu, expand Settings.
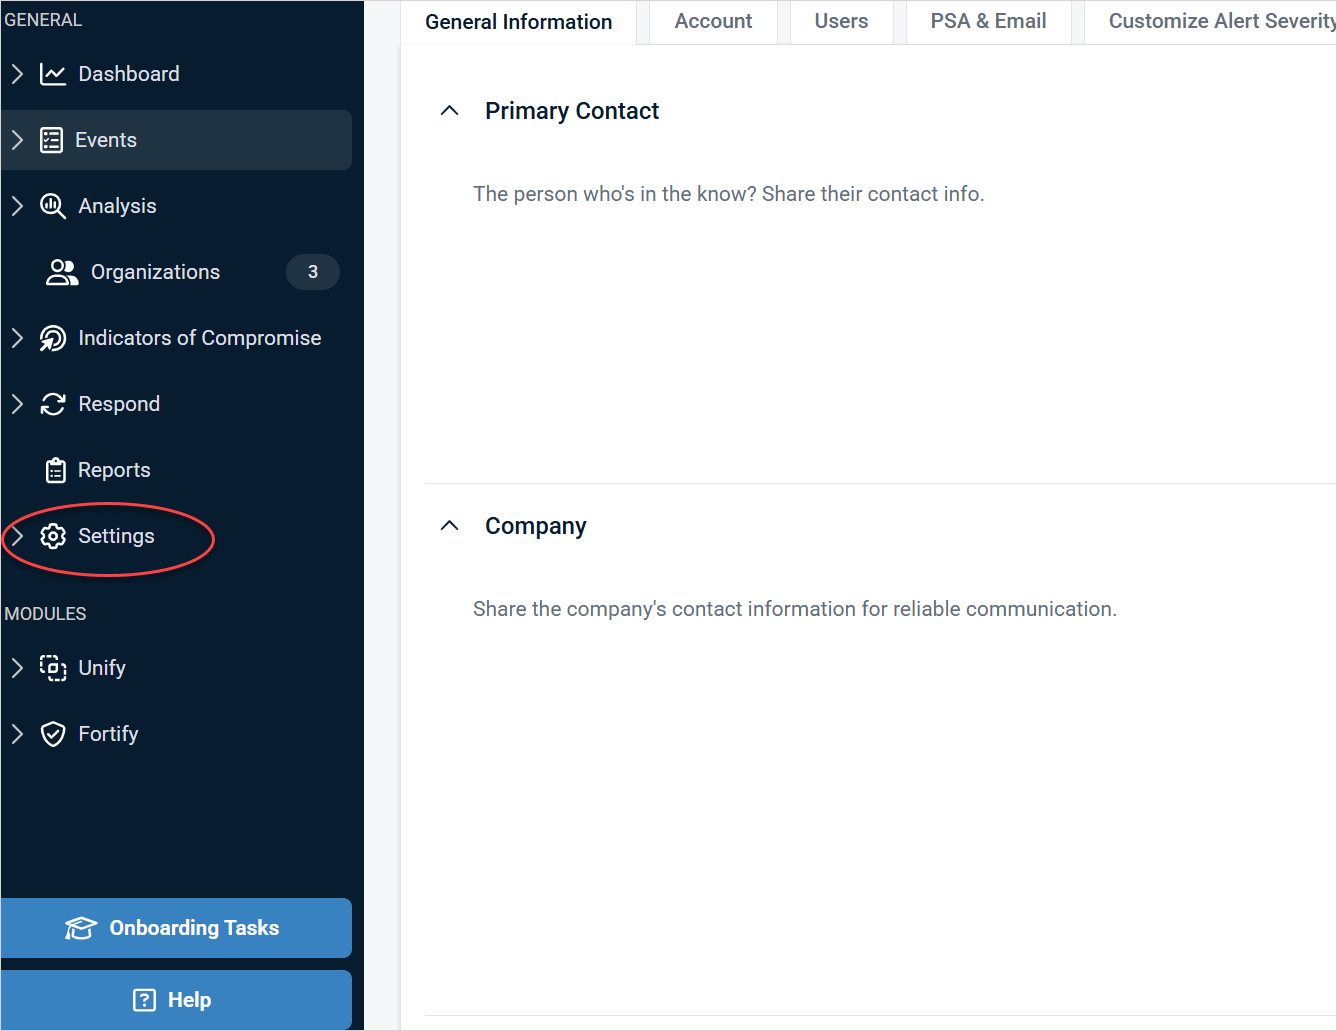
- Click Users.
- In the Single Sign-On section, ensure the Allow Users to Login with KaseyaOne toggle is turned on.
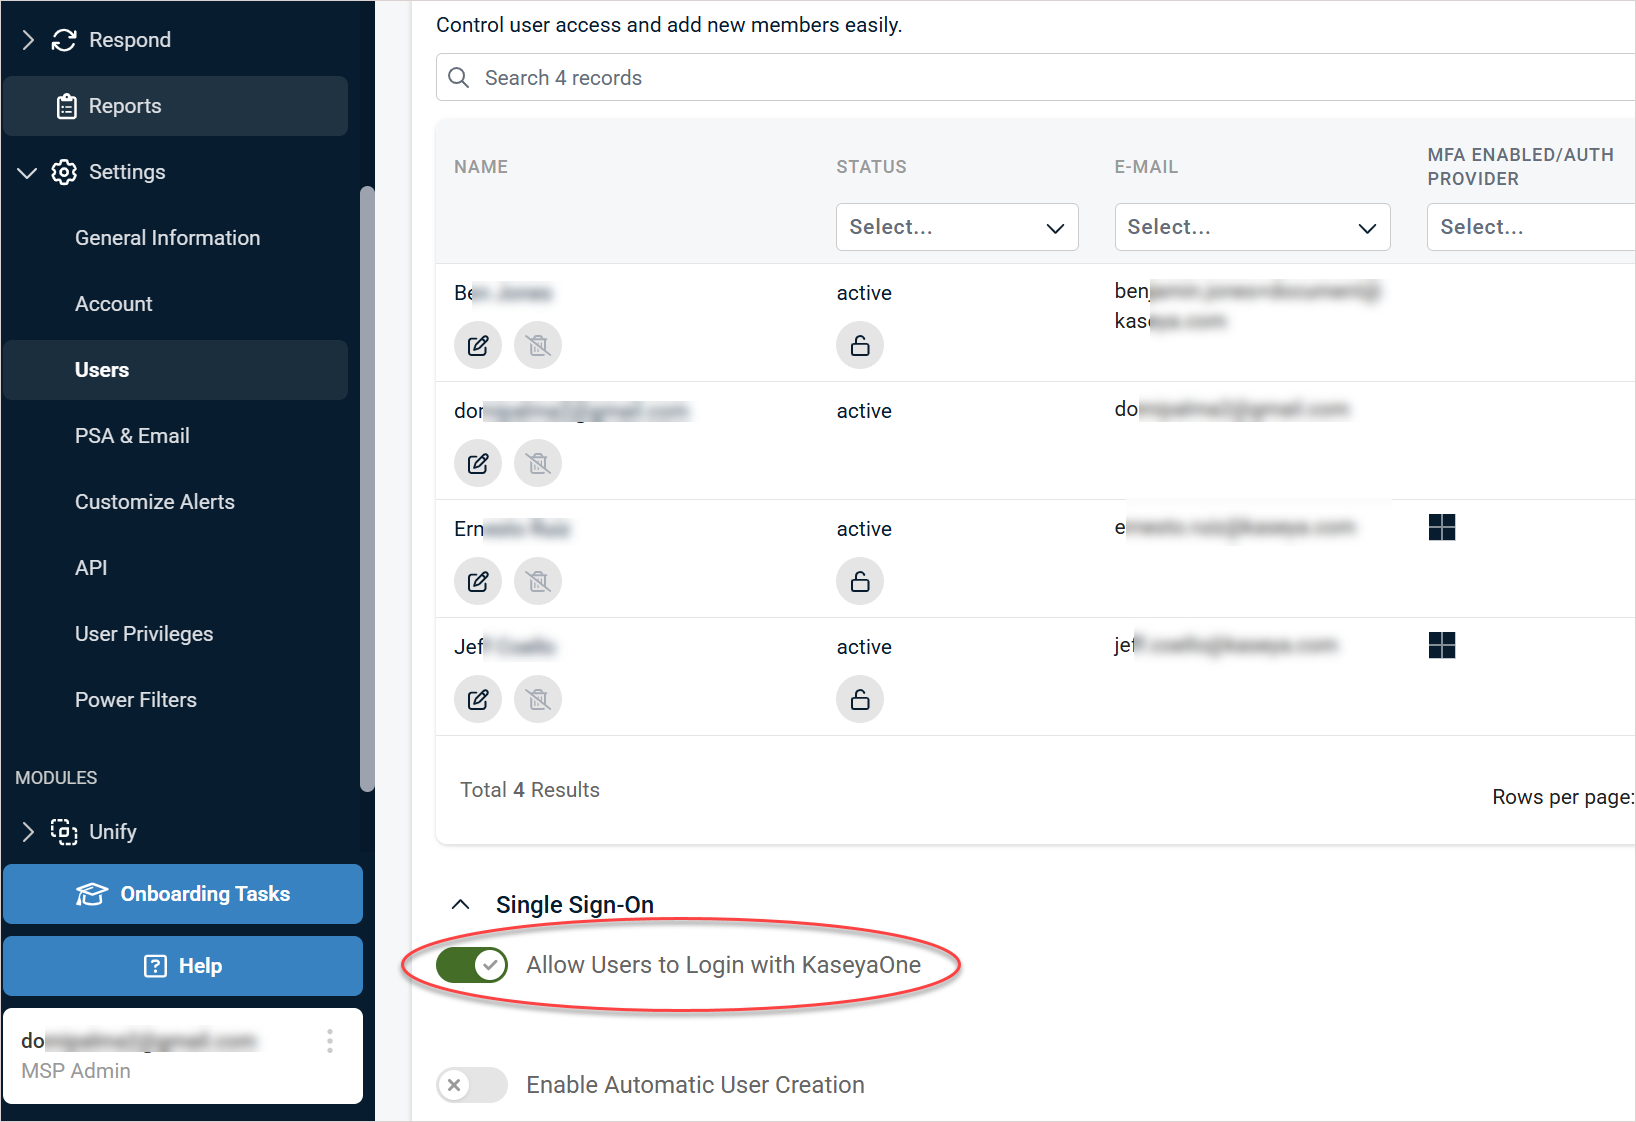
- Turn on the Enable Automatic User Creation toggle.
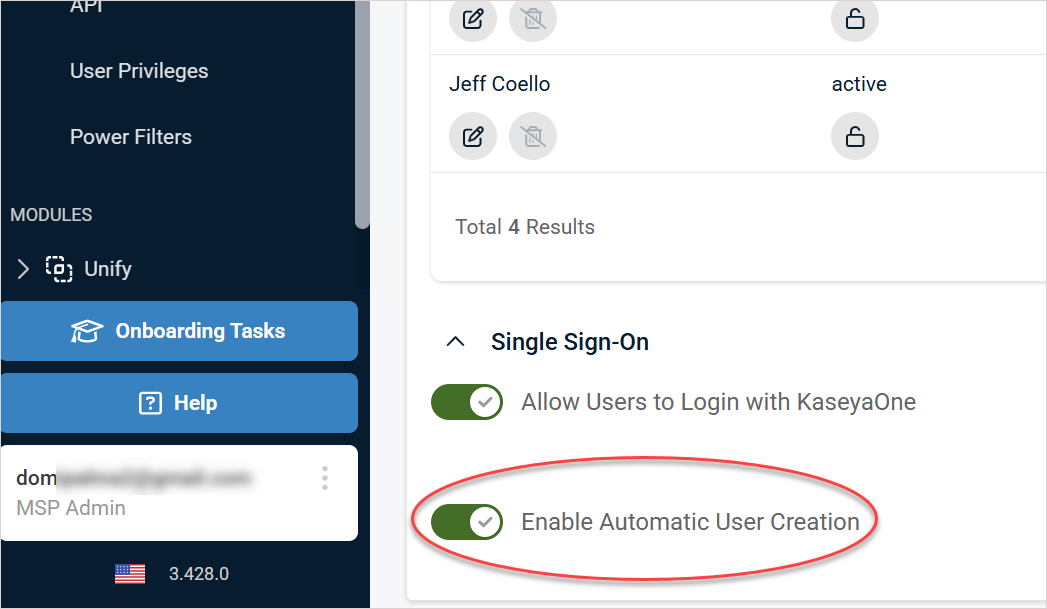
Once enabled, SaaS Alerts allows users to be created automatically through KaseyaOne authentication. For more information, see this SaaS Alerts article: Setting up automatic user creation.
To enable Automatic User Provisioning for UniView, do the following:
- Log in to the UniView Portal as a superuser in the usual way and click the cogwheel icon on the application banner.

- Go to the Integrations tab, locate the KaseyaOne integration and click Show configuration.

- Go to the Automatic User Creation section and turn on the Enable Automatic User Creation toggle to enable the feature.
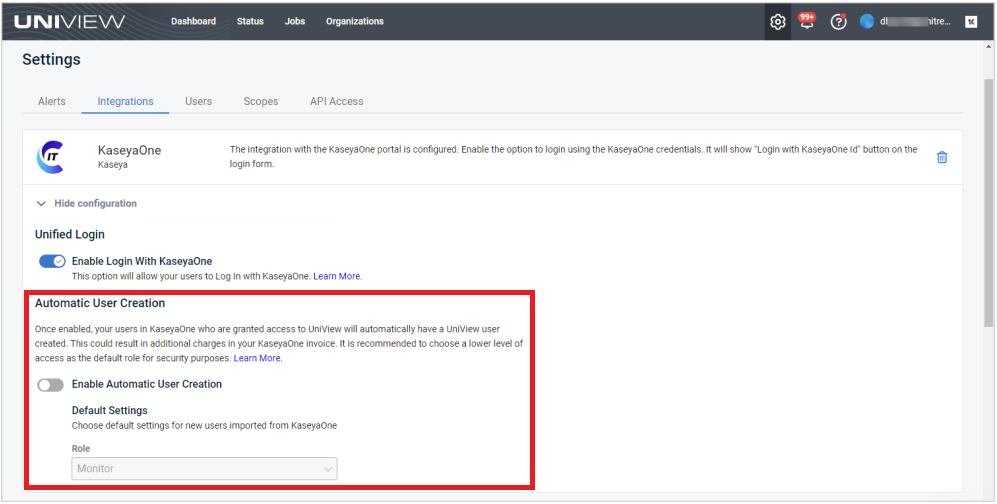
- In the Role field under Default Settings, click the drop-down arrow and select the default role to assign to new KaseyaOne users. Options include: Monitor, Manager, Admin, or Superuser.
For more information, refer to the UniView Portal Guide.
To enable Automatic User Creation for vPenTest, do the following:
NOTE A prerequisite to enabling this feature is to enable Unified Login with KaseyaOne. Refer to Enable Log In with KaseyaOne for vPenTest.
- Log in to vPenTest in the usual way.
- Navigate to the Global Options page from the left navigation menu and select the KaseyaOne tab.
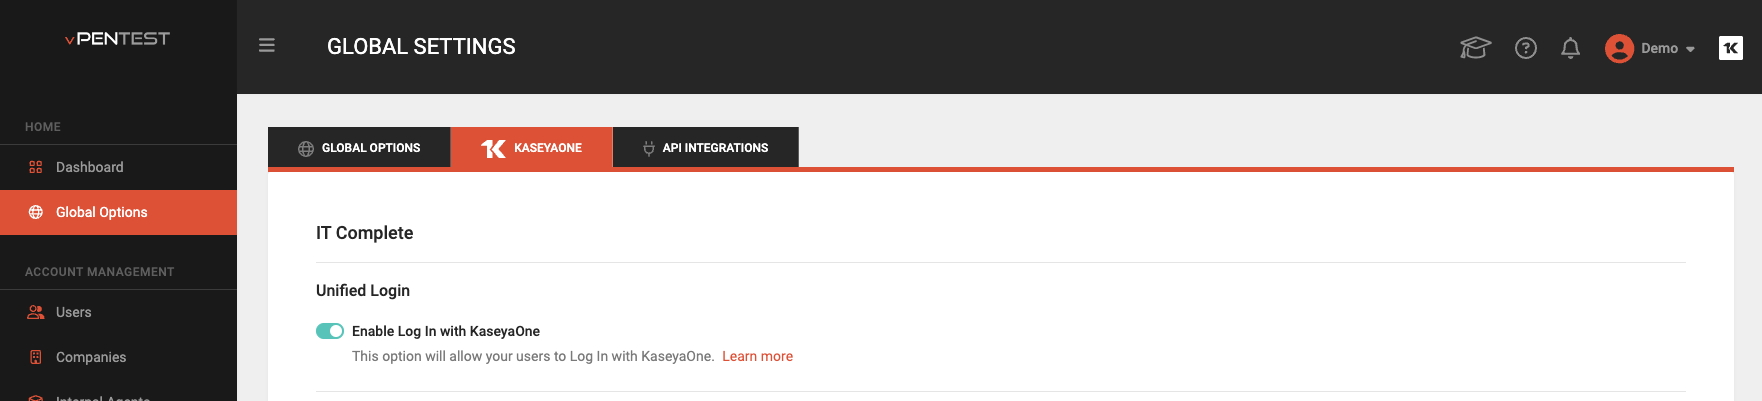
- Under Automatic User Creation, turn on the Enable Automatic User Creation toggle.
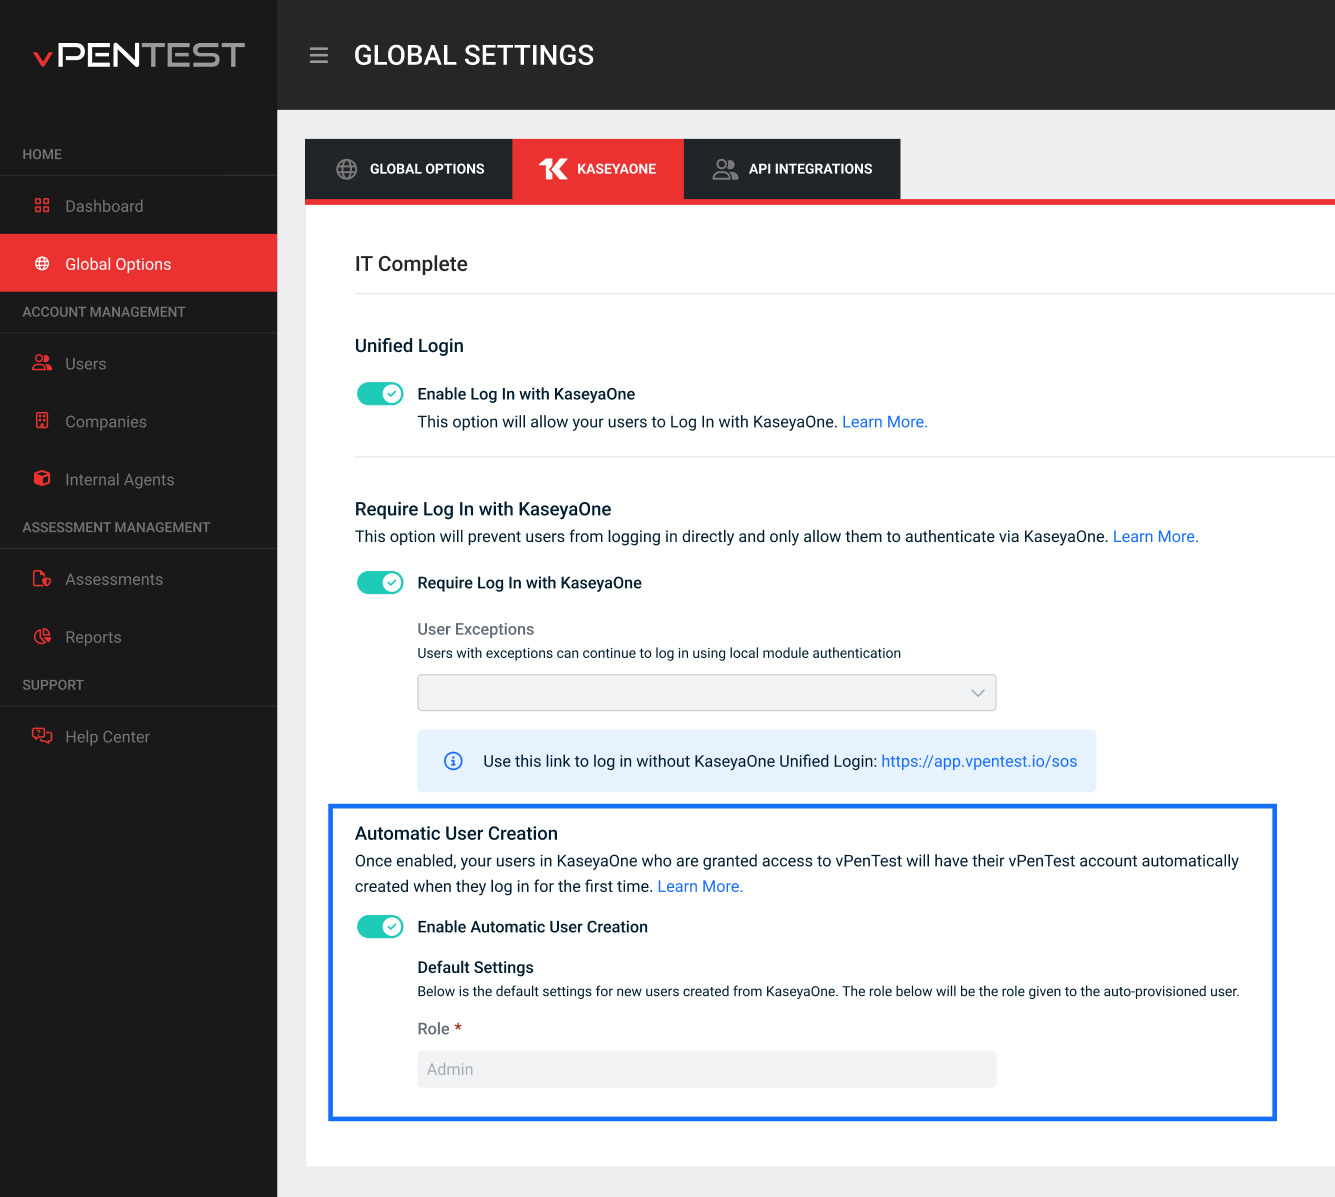
- Click Save.
For more information, refer to the Vonahi Help.
To enable Automatic User Provisioning for VSA 10, do the following:
NOTE A prerequisite to enabling this feature is to enable Unified Login with KaseyaOne — refer to Enable Log In with KaseyaOne for VSA 10.
- Log in to VSA 10 in the usual way.
- Navigate to Administration > Configuration > Settings on the left navigation menu and select KaseyaOne Log In Settings.
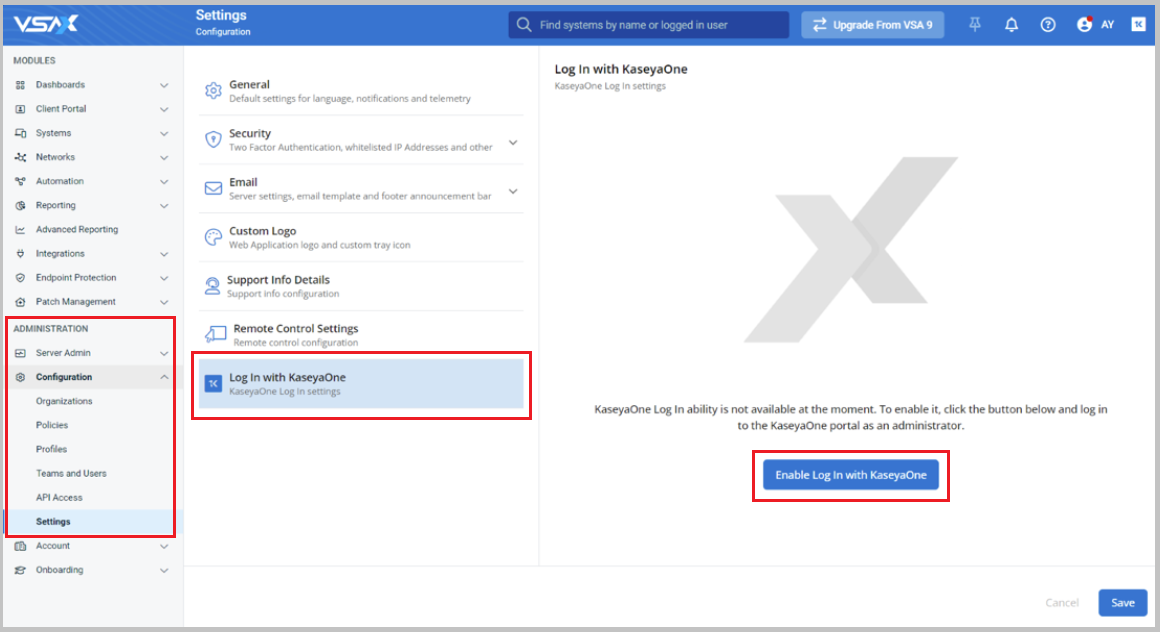
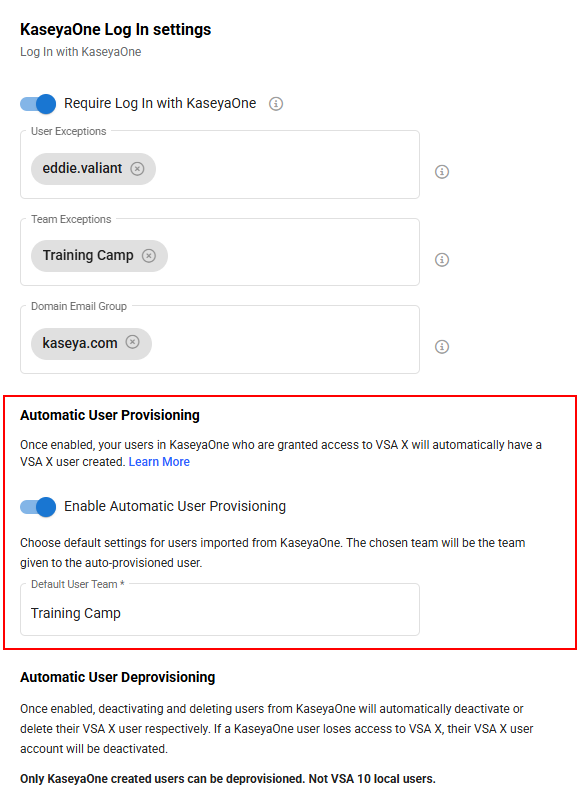
- Under Automatic User Creation, turn on the Enable Automatic User Creation toggle. A set of options within the Default User Team field will appear. The selected team will be the team assigned to automatically provisioned users.
- Click Save.
For more information, refer to Unified Login with KaseyaOne in the VSA 10 Help.


