Onboarding checklist
NAVIGATION Home > Dashboard > Setup widget
NAVIGATION Header > Admin Settings > Setup Summary
PERMISSIONS Admin role
As a user with the Admin role, completing the administrative onboarding checklist helps kick-start your KaseyaOne experience and tracks configuration of essential account settings.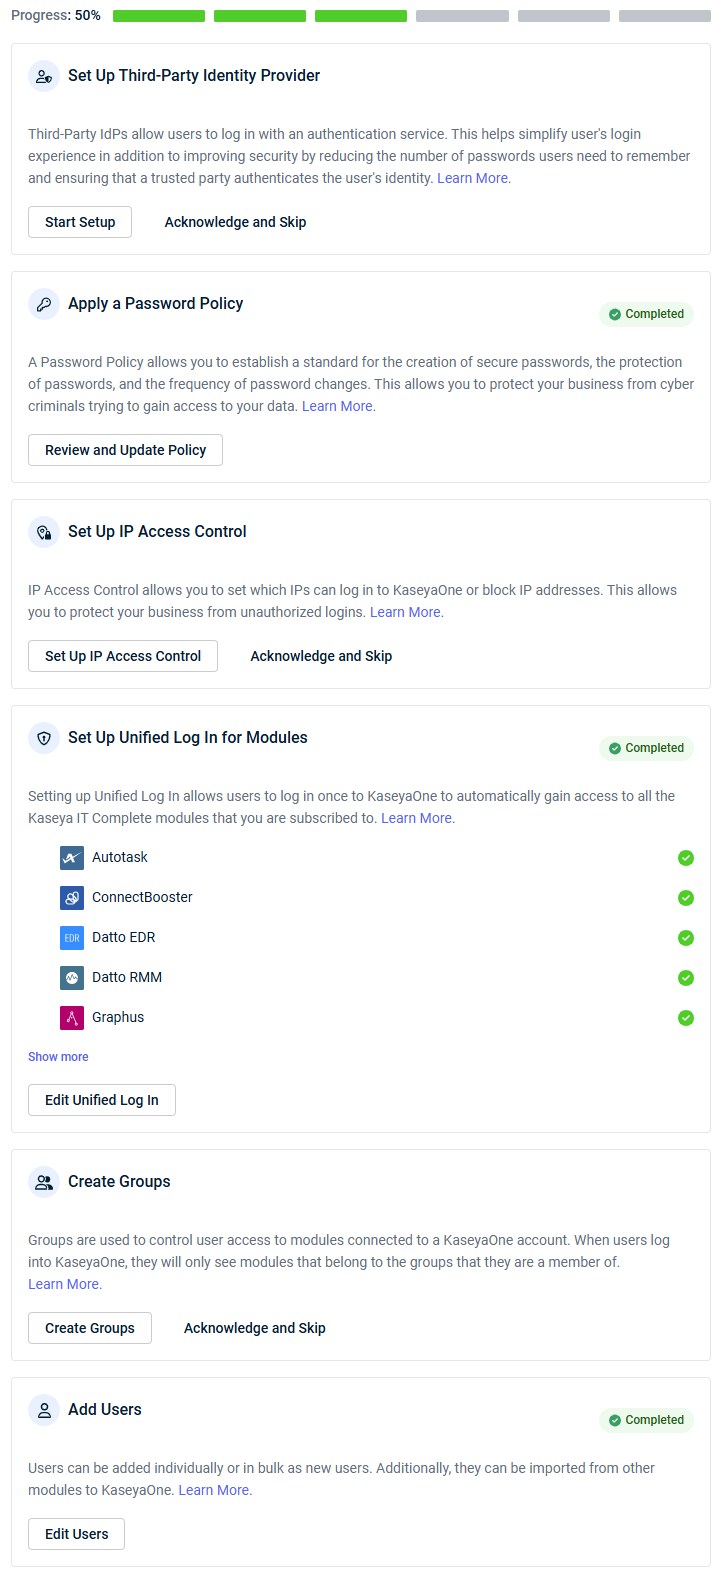
The purpose of the onboarding checklist is to help you get the most of out your new KaseyaOne account. You can complete each step or skip steps that are not applicable to your business needs. You can also return to steps that you skipped and complete them later.
The onboarding checklist shows, at a glance, which steps are done, which are outstanding or incomplete, and which were skipped. The progress bar at the top of the checklist updates incrementally to clearly show the percentage of steps that are complete.
Completing the onboarding checklist
- To access the onboarding checklist, refer to Security and navigation. For details about the setup summary on the home page dashboard, refer to Setup widget in Navigating KaseyaOne.
- Complete each step in the checklist as required:
- Set Up Third-Party Identity Provider: Click the action button to set up and manage a third-party IdP integration. Refer to Third-party IdP SSO integration.
- Apply a Password Policy: Click the action button to configure the password policy for your organization. Refer to Apply a password policy in Managing KaseyaOne security.
- Set Up IP Access Control: Click the action button to enable and configure the IP Address Access List feature and to specify from which IP addresses users can log in to their KaseyaOne account. Refer to Set up IP access control in Managing KaseyaOne security.
- Set Up Unified Log In for Modules: Click the action button to configure Unified Login and its related features for modules. Refer to Integrating modules with KaseyaOne.
- Create Groups: Click the action button to create groups that control user access to modules connected to the KaseyaOne account. Refer to Managing KaseyaOne groups.
- Add Users: Click the action button to add and configure new user accounts. Refer to Managing KaseyaOne users.
- To skip a step, click Acknowledge and Skip, which tags the step as Skipped.
- After you complete a step and the system identifies that the feature from the checklist was configured/updated, the step is automatically tagged as Completed. The progress bar at the top of the checklist increments accordingly (in both the setup widget on the home page dashboard and on the Setup Summary page).


