Managing KaseyaOne users
NAVIGATION Header > Admin Settings > User Management
PERMISSIONS Admin role
The User Management page is where you manage all KaseyaOne users and their accounts. From this page, users with the Admin role can add, edit, activate, deactivate, and delete individual users, reset user passwords and two-factor authentication (2FA), resend invitation emails, and import users in bulk.
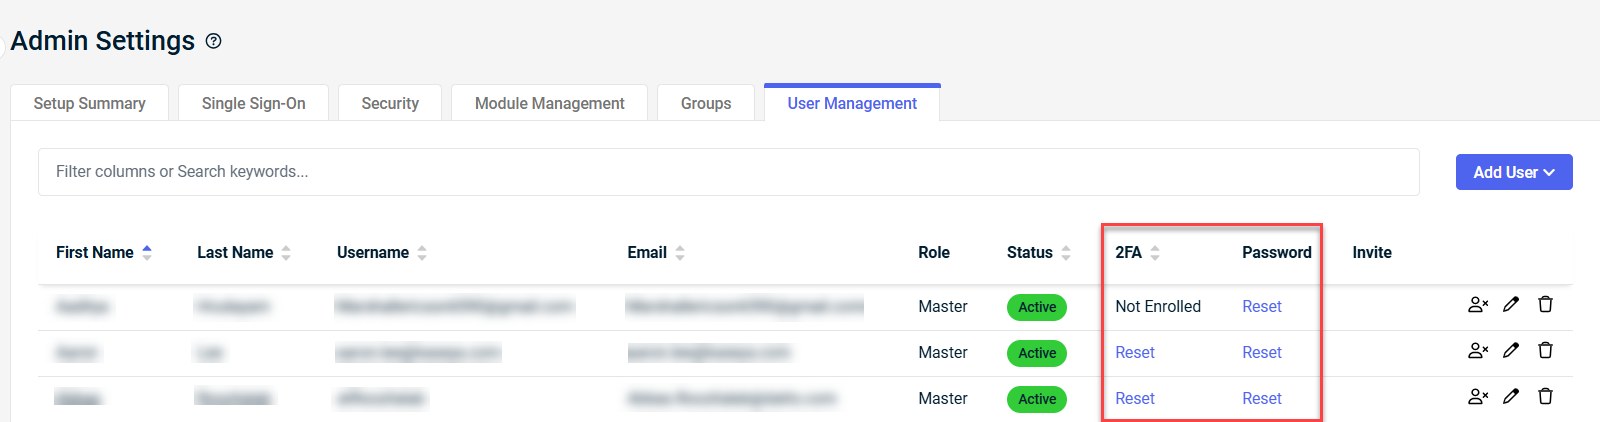
User Management page
The User Management page displays all users in your organization. The following sections describe the reference information available on this page.
User roles
A role is assigned when you create or edit a user account and determines that user's access and permitted actions in KaseyaOne. Each user must be assigned to one role.
Users in all roles have access to the modules and Kaseya University courses when an Admin user adds or edits their accounts.
IMPORTANT The Kaseya University course selection drop-down menu has been removed. All users now automatically have full access to all available courses without the need for manual assignments.
The following roles are available:
| Role | Description | Notes |
|---|---|---|
| Admin | A user with this role has access to all areas of KaseyaOne, including Cooper Intelligence Engine functionality, the Organization Dashboard page, the Admin Settings page, and the Kaseya Professional Services page. These users can add and edit all users, assign user roles, and create Unified Login integrations. These users can manage billing information, request subscriptions and licenses, view invoice history, and view all company support tickets. These users can navigate to Kaseya Store, Kaseya University, Kaseya Community, and Kaseya Merch Store from KaseyaOne. | See Root Admin below. |
| Root Admin | The first user invited to the portal is the Root Admin user. | This user's role cannot be changed, and their account cannot be deleted unless another user is promoted to Root Admin. Only Kaseya support can promote a user to Root Admin. |
| Billing and Purchasing | A user with this role has access to some areas of KaseyaOne, including Cooper Intelligence Engine functionality, the Organization Dashboard page, and the Kaseya Professional Services page. These users can edit their own user information, manage billing information, request subscriptions and licenses, view invoice history, and view billing support tickets. These users can navigate to Kaseya Store, Kaseya University, Kaseya Community, and Kaseya Merch Store from KaseyaOne. | A user with this role cannot add or edit users. |
| User | A user with this role has access to some areas of KaseyaOne, including Cooper Intelligence Engine functionality and the Kaseya Professional Services page. These users can edit their own user information and view support tickets they submitted or were CCd on. These users can navigate to Kaseya University, Kaseya Community, and Kaseya Merch Store from KaseyaOne. | A user with this role cannot add or edit users or access subscriptions and billing information. |
| Co-Managed User | A user with this role has limited access to KaseyaOne, does not see My Account Team information, and can see only the My Modules section on the home page. These users can edit their own user information and navigate to Kaseya University from KaseyaOne. | These users cannot view any information on the Support page. They see this message only: Need help? If you have any issues with using KaseyaOne please contact your administrator. These users cannot view or create support tickets, add or edit users, or access subscriptions and billing information. |
User status
User status is shown on the User Management page.
| Status | Description | Action |
|---|---|---|
| Invited | An invitation email has been sent to the new user's email address. | The new user must click the link in the email to verify their email address and set a password. |
| Active | The user account is active. | After the user signs up for and enrolls with 2FA, their account status changes to Active. After an Admin user reactivates a deactivated user, their account status also changes to Active. Users must reset their password and 2FA after being reactivated. |
| Deactivated | The user account has been deactivated or the user has lost access to KaseyaOne. A user can be automatically deactivated if third-party single sign-on (SSO) is set up for the module with Enable Mapping Rules switched on, and they are not part of the mapped groups. | Deactivated users are logged out of any active KaseyaOne sessions and can no longer access KaseyaOne or use Log In with KaseyaOne to access their modules. Deactivated users retain all their KaseyaOne settings, including group membership, and can be reactivated. |
| LockedOut | The user account has been locked, for example due to a forgotten password or too many failed login attempts. |
The user must wait approximately 10 minutes before trying to log in again.
Refer to Unlock a locked-out user for instructions on how to unlock a user as an Admin user. NOTE Your organization's password policy defines the length of time users are locked out. Refer to Apply a password policy. |
How to...
Before adding the user to KaseyaOne, ensure that the user's email address is valid by sending a test email message.
NOTE Kaseya automatically adds undeliverable email addresses to an internal suppression list. Once on this list, subsequent emails, including KaseyaOne user activation invitations, are blocked. Refer to KaseyaOne: Troubleshoot why a new user is not receiving their welcome email.
To add an individual user to KaseyaOne, do the following:
- Log in to KaseyaOne as an Admin user.
- Navigate to Admin Settings > User Management.
- Click Add User and select New User from the drop-down menu.
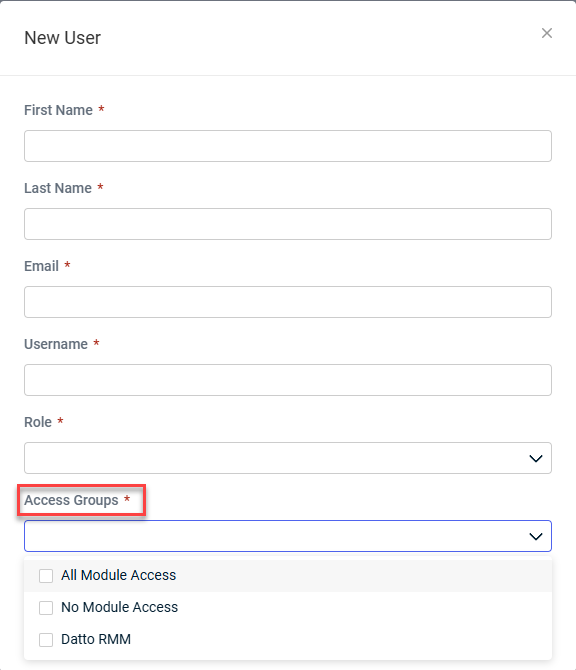
- In the New User form that opens, complete the following fields:

| Field Name | Description |
|---|---|
|
First Name |
The maximum length is 48 characters, consisting of international letters, numbers, spaces, dashes and apostrophes. |
|
Last Name |
|
|
|
Enter a valid email address. The maximum length is 100 characters. |
|
Username |
This field is automatically populated with the value entered in the Email field but can be edited. The maximum length is 50 characters. The value cannot contain the following characters: #/?\. NOTE The username cannot be changed after the user account is saved. |
|
Role |
Click the drop-down control and select one of the following roles to assign to the user: Admin, Billing and Purchasing, User, or Co-Managed User. For a description of these roles, refer to User roles. |
|
Access Groups |
Click the drop-down control and select one or more active or inactive access groups to assign to the user — inactive access groups have an Inactive Group icon next to them as shown in the following image. After you activate a deactivated group, all users assigned to that group will have access to all modules assigned to the group. Deselect All Module Access if you do not want the user to have access to all modules. |
- Click Add.
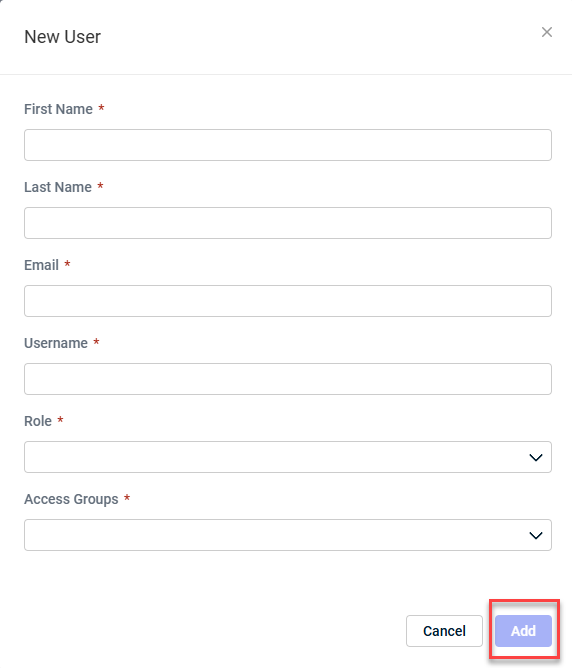
The new user will be created and an invitation email will be sent to the user's email address.
The user's account status will change to Invited and their 2FA status will change to Not Enrolled.
After a user signs up for and enrolls with 2FA, their status will change to Active and their 2FA Reset option will be available.
To create multiple user accounts at once, upload a CSV file. To do so, complete the following steps:
- Navigate to Admin Settings > User Management and click Add User.
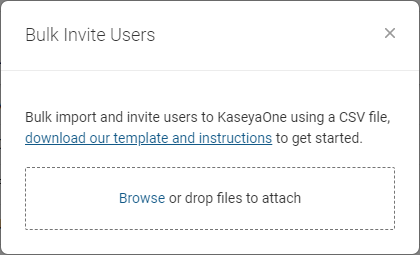
- Select Bulk Invite CSV and in the Bulk Invite Users window that opens, click the download our template and instructions link.
A ZIP file called users downloads to your default Downloads folder.
- Unzip the users file and open the README file for information on CSV format and validation.
- Open the users spreadsheet and add the users you want to import. Complete the following fields — all fields are required:
Field Description Username Maximum 50 characters. The field cannot contain the following characters: hash (#), forward slash (/), question mark (?), or back slash (\).
NOTE The username cannot be changed after the user account is saved.
Email Type a valid email address. Maximum 100 characters. Role Type the name of one of the following roles: Admin, Billing and Purchasing, User, or Co-Managed User. For a description of each role, refer to User roles. Groups Type the name of one or more access groups to assign to the user. Group names are case-sensitive and must match exactly the group name in KaseyaOne. First Name Maximum 48 characters. Can include international letters, numbers, spaces, dashes, and apostrophes. Last Name Maximum 48 characters. Can include international letters, numbers, spaces, dashes, and apostrophes. - Save the CSV file and drag it to the Bulk Invite Users window, or click Browse to select it. The user import begins automatically once the file is uploaded.
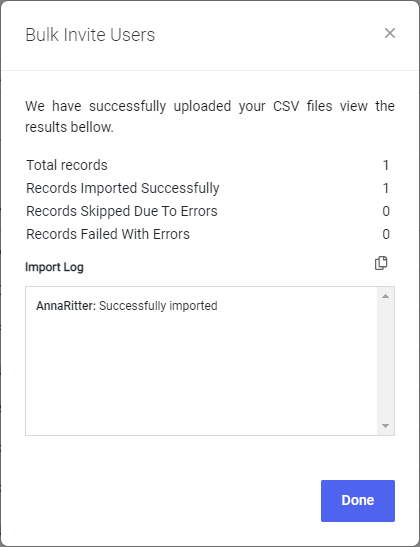
- After the CSV file uploads successfully, review the results and click Done.
KaseyaOne creates the new users and sends an invitation email to each user's email address. Each user's account status changes to Invited and their 2FA status changes to Not Enrolled. After a user signs up for and enrolls with 2FA, their status changes to Active and the Reset option becomes available in the 2FA and Password columns.
NOTE This feature is available for certain Kaseya Platform modules only. To check which modules support this feature, refer to Module integration feature availability.
To import users from a module, complete the following steps:
- Navigate to Admin Settings > User Management, click Add User, and then click Import from Module.
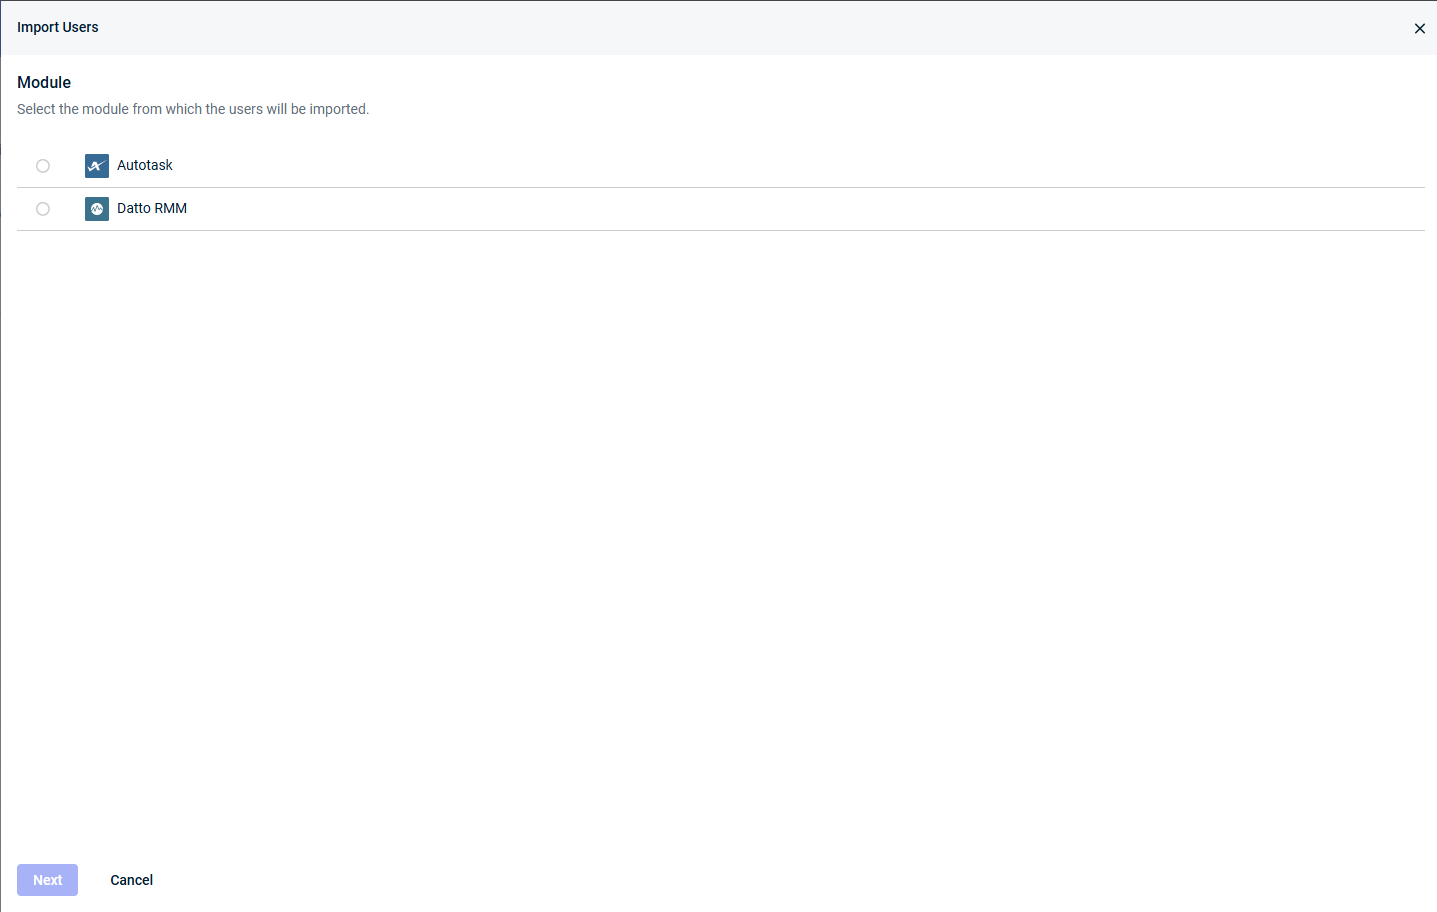
- On the Import Users page:
- Select the module from which to import users. If the module has multiple instances, expand the module option and select an instance.
- If none of your modules are connected to KaseyaOne, you receive the following message: Supporting modules are not connected to KaseyaOne.
- Click Next.
- Select the users you want to import and then click Next.
- Configure settings and user access. You must specify the KaseyaOne role and group to assign to users after import. You can do this in bulk for all users or individually for each user.
TIP To save time, bulk-assign settings to all users first and then adjust settings for individual users as needed.
- In the Assign to All section, bulk-assign the same settings and access to all users being imported:
- KaseyaOne Role. Select the role to assign to imported users in KaseyaOne.
- Group. Select the access group or groups to assign to imported users in KaseyaOne.

- (Optional) In the Assign Individual Users section, assign settings and access individually to each user:
- KaseyaOne Role. Select the role to assign to the user in KaseyaOne.
- Group. Select the access group or groups to assign to the user in KaseyaOne.
- Click Next.
- In the Assign to All section, bulk-assign the same settings and access to all users being imported:
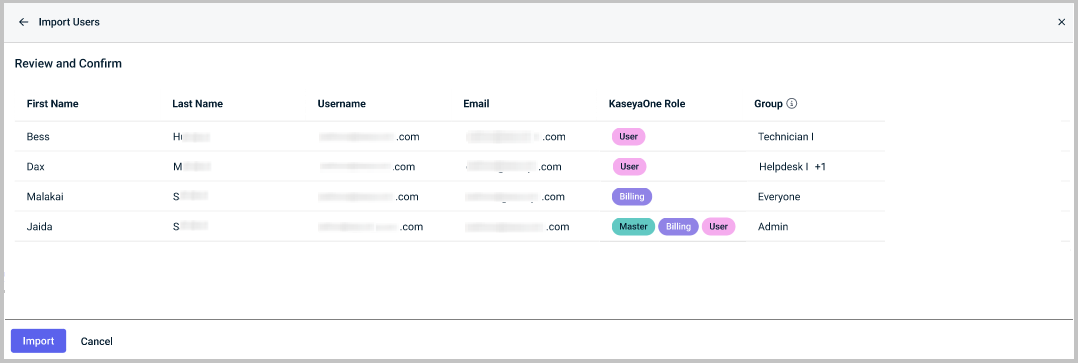
- Review and confirm your assignments and then click Import. The import may take some time to complete.
- When the import finishes, review the results.
- The results show the number of records successfully imported, the number of records skipped due to errors (for example, the user already exists in KaseyaOne), and the number of records that failed with errors.
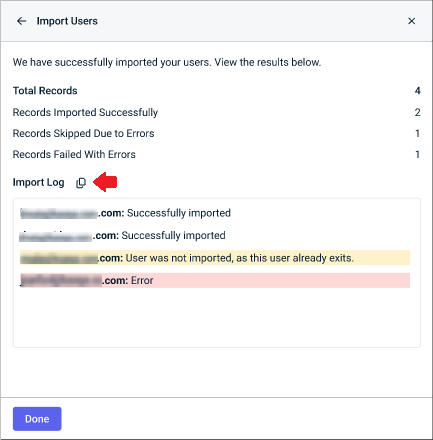
- Click Copy to copy the import log for closer review.
- Click Done when you finish reviewing the results.
After the import, KaseyaOne creates the new users and sends an invitation email to each user's email address. Newly invited users must activate their accounts within 14 days of receiving the invitation email; otherwise the activation link expires. If the link expires, users must contact their KaseyaOne Admin user to request that the invitation email be resent.
- The results show the number of records successfully imported, the number of records skipped due to errors (for example, the user already exists in KaseyaOne), and the number of records that failed with errors.
Search for users in the following ways:
- Click any of the following column headings to sort the column in ascending or descending order: First Name, Last Name, Username, Status, and 2FA.
- Use the search bar to search the list by keyword, or filter by Role or Status.
To edit a user in KaseyaOne, complete the following steps:
- Navigate to Admin Settings > User Management.
- Locate the user record you want to modify and click the Edit icon (pencil) next to the user.
- Make your changes in the Edit User window. You can edit all fields except Username.
- Click Save.
NOTE If you change the email address, it is not updated until the user clicks the confirmation link sent to the new email address.
You can deactivate a user rather than deleting them. Deactivated users can be reactivated at a later date, but deleted users cannot. Only an Admin user can deactivate users, and you cannot deactivate yourself.
NOTE The Root user cannot be deactivated.
To deactivate a user with an Active status, complete the following steps:
- Navigate to Admin Settings > User Management.
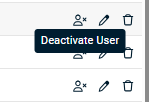
- Locate the user you want to deactivate and click Deactivate User next to the user.
- Click Deactivate when prompted to confirm.
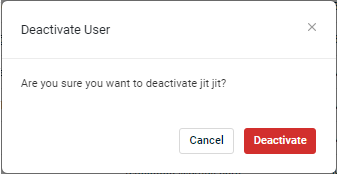
A confirmation message appears and Deactivated appears in the user's Status field.
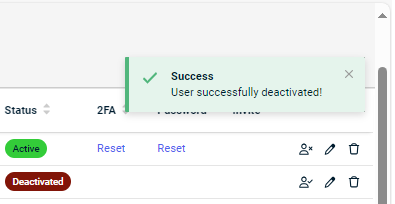
Deactivated users are logged out of any active KaseyaOne sessions and can no longer access KaseyaOne or use Log In with KaseyaOne to access their modules. They retain all their KaseyaOne settings, including group membership.
Only an Admin user can activate users with a Deactivated status, and you cannot activate yourself.
NOTE The Root user cannot be activated.
To activate a user with a Deactivated status, complete the following steps:
- Navigate to Admin Settings > User Management.
- Locate the user you want to activate and click Activate User next to the user.

- Click Activate when prompted to confirm.
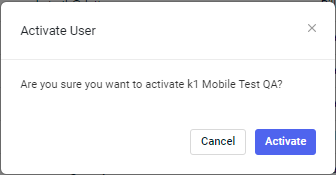
A confirmation message appears and Active appears in the user's Status field. After you activate a user, that user must set their password and configure their 2FA.
If a user has not received or responded to their invitation to enroll in KaseyaOne, or the activation link in their email has expired, you can resend the invitation.
Before resending the invitation, ensure that the user's email address is valid by sending a test email message.
NOTE Kaseya automatically adds undeliverable email addresses to an internal suppression list. Once on this list, subsequent emails, including KaseyaOne user activation invitations, are blocked. Refer to KaseyaOne: Troubleshoot why a new user is not receiving their welcome email.
To resend the invitation email, complete the following steps:
- Navigate to Admin Settings > User Management.
- In the Invite column of the affected user, click Resend.
KaseyaOne sends the invitation email to the user's email address.
Reset a user's password or 2FA if they forget their password, lock their account after too many failed login attempts, or lose the device that generates their 2FA token. To do so, complete the following steps:
- Navigate to Admin Settings > User Management.
- Click the Reset link in the 2FA or Password column.
- In the Reset Password or Reset 2FA window, click Reset.

A confirmation message appears confirming the password or 2FA was successfully reset.
If you reset 2FA for a user, their 2FA status changes to Not Enrolled and they must configure 2FA again the next time they log in to KaseyaOne. Refer to Setting up the primary user account (Root Admin).
If you reset the password for a user, that user is prompted to create a new password. The password reset link expires after 24 hours.
To learn about applying a password policy as an Admin user, refer to Apply a password policy.
Refer to LockedOut in User status to learn about locked-out users.
To unlock a user with the LockedOut status as an Admin user, complete the following steps:
- Navigate to Admin Settings > User Management.
- Locate the user record and click the Unlock User icon
 .
.
The user immediately regains the ability to log in to their KaseyaOne account.
To delete a user from KaseyaOne, complete the following steps:
- Navigate to Admin Settings > User Management.
- Locate the user record you want to delete and click the Delete icon (trash can) next to the user.
- Click Delete when prompted to confirm. A confirmation message appears confirming the user was successfully deleted.


