Managing KaseyaOne security
NAVIGATION Header > Admin Settings > Security
PERMISSIONS Admin role
From the Security page within Admin Settings, you can do the following:
- Manage the password requirements for users logging in to KaseyaOne. It's important to define a password policy that will establish a standard for creating secure passwords and protecting passwords. Refer to Apply a password policy.
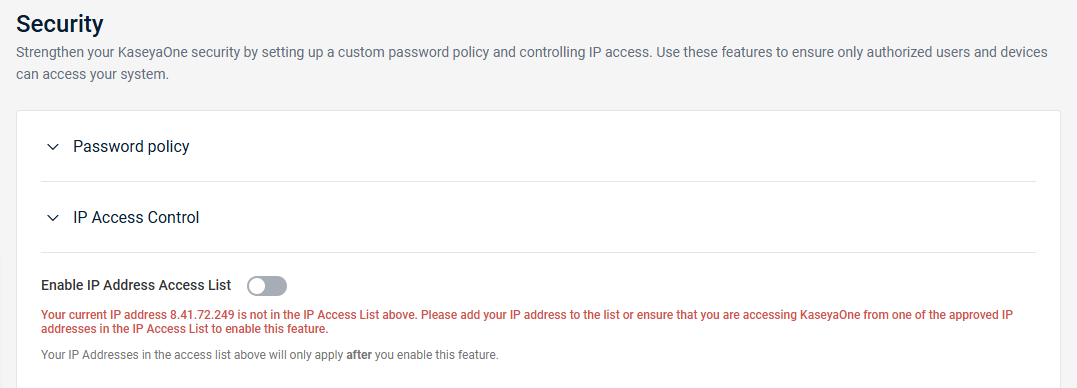
- Enable the IP Address Access List feature. This allows you to specify from which IPs users can log in to their KaseyaOne account, to block IP addresses, and ultimately protect your business from unauthorized logins. Refer to Set up IP access control.
- Allowlist the IP addresses, including all IPv6 addresses from where you log in, to avoid allowlisting conflicts. Refer to Set up IP access control.
How to...
Apply a password policy
It's important to define a password policy that will establish a standard for creating secure passwords and protecting passwords. This allows you to protect your business from cyber criminals trying to gain access to your data. Only Admin users can change the password requirements for KaseyaOne.
To apply a password policy, do the following:
-
Navigate to the Admin Settings Security page. Refer to Security and navigation.
-
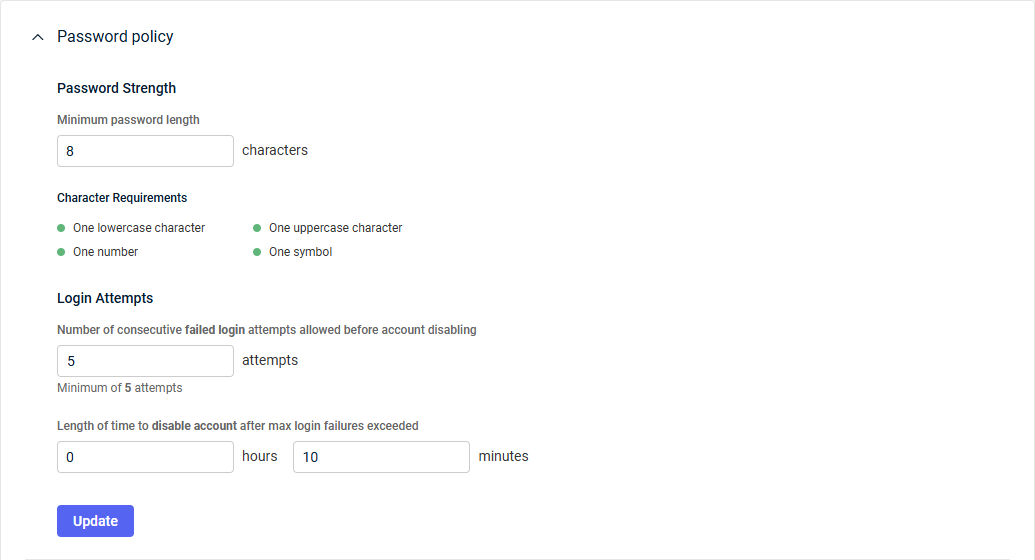
Expand the Password policy section.
-
Configure the following fields:
| Field | Description |
|---|---|
|
Password Strength |
|
| Minimum password length | Enter the minimum number of characters required in the password each user sets. The default value is 8 characters. The value you enter must be between 8 and 64. Review the Character Requirements section for additional password requirements. |
| Login Attempts | |
| Number of consecutive failed login attempts allowed before account disabling | Enter the number of times a user can unsuccessfully attempt to log in before their account is disabled. NOTE A disabled account requires the user to wait for their account to be automatically reenabled after the amount of time specified in the next field or must be reset by a user with the Admin role. Refer to Reset a user's password or 2FA. The default value is 5 attempts. The value you enter must be 5 or higher. |
| Length of time to disable account after max login failures exceeded | Enter the amount of time a user must wait for their account to be automatically reenabled after their account is disabled from exceeding the failed login attempt limit specified in the previous field. The values you enter must be between 0 hours and 1 minute and 23 hours and 59 minutes. |
-
Click Update to save your changes.
Enhance the security of KaseyaOne by adding the IP addresses from where registered users can access the company account. Users will not be able to access KaseyaOne from IP addresses that are not listed here.
Setting up and enabling an IP address access list adds an extra layer of security to a portal that provides Unified Login access to multiple applications.
NOTE List the IPv4 and IPv6 addresses of all your office locations and of employees who are working from home. If your ISP uses dynamic IP addresses, contact them to confirm dynamic IP address ranges before proceeding.
To add IP addresses to your account allowlist, complete the following steps:
-
Navigate to the Admin Settings Security page. Refer to Security and navigation.
-
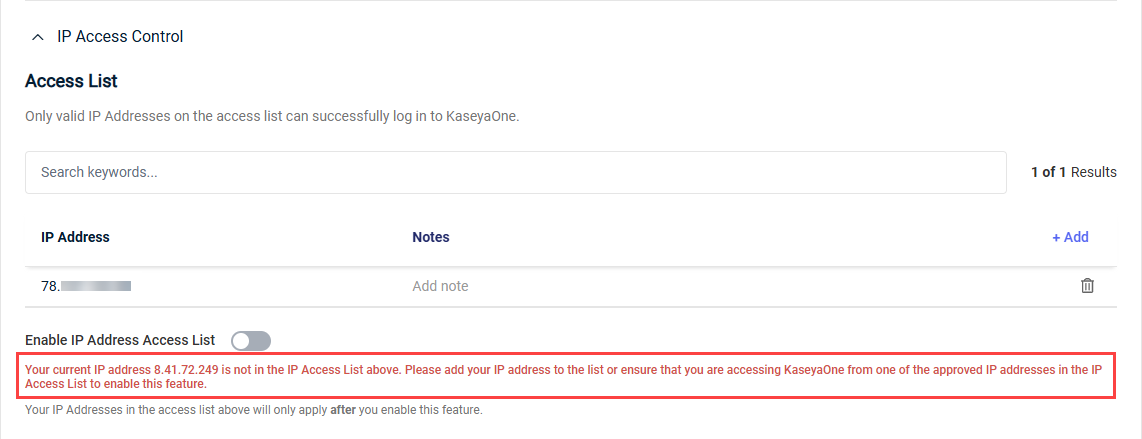
Expand the IP Access Control section.
-
A note in red will indicate if your current IP address is not yet added to the allowlist. To configure and enable this feature, you must add your current IP address, which prevents you from inadvertently blocking your own access to your KaseyaOne account.
-
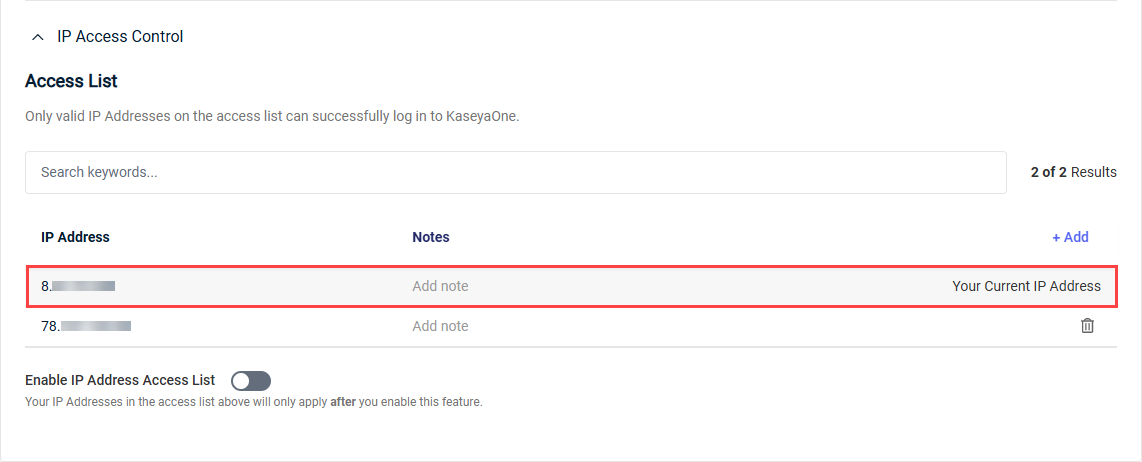
Click Add to add your own IP address to the allowlist, which cannot be deleted.
-
To add additional IP addresses to the allowlist, click Add.
-
In the Add IP Addresses dialog box, fill in the fields described in the following table:
| Field | Description |
|---|---|
| IP Address | Enter one or multiple IP addresses, separated by adding commas, pressing Tab on your keyboard, or pressing Enter on your keyboard. To remove an IP address, click the X on the IP address tag. To specify an IP range, use CIDR notation. EXAMPLE 192.168.1.1/24 |
| Note | This field is enabled if only one IP address was entered in the IP Address field. If you are adding multiple addresses, you can add a note in the list once the addresses are saved. |
-
Click Add to add the IP addresses to the allowlist.
-
Turn on the Enable IP Address Access List toggle to enable the feature. The toggle is disabled until you add your current IP address to the allowlist.

Now, users will only be able to access your KaseyaOne account from the IP addresses on your list.
To disable this feature and allow access from any IP addresses, turn off the Enable IP Address Access List toggle.
If you are managing a large number of IP addresses, you can use the Search keywords... search bar in the IP Access Control section to locate a specific address. You can also search for components of the IP address or keywords in the Notes field.
In the IP Access Control section, you can add or edit notes associated with IP addresses at any time. Click the pencil icon ![]() in the Notes column, enter or edit a note, and click the check mark to save your note.
in the Notes column, enter or edit a note, and click the check mark to save your note.
To delete an IP address that is no longer valid, click the trash can icon ![]() , and then confirm the deletion.
, and then confirm the deletion.


