Getting started with Kaseya 365 Endpoint
PERMISSIONS Admin role in KaseyaOne
Note: If you are the subscription's implementation contact and were already using KaseyaOne without the Admin role, you will be able to view the Kaseya 365 Setup Guide but will need the Admin role to enable Unified Login for your Kaseya 365 Endpoint modules. Request a Admin role account from your KaseyaOne administrator.
PERMISSIONS User accounts with the highest permission level (Admin, Superuser, Administrator, or Global Administrator) for each of your modules in the Kaseya 365 subscription. If you need an account with a higher permission level, contact your module's administrator.
NAVIGATION KaseyaOne left navigation menu > Kaseya 365 Setup Guide
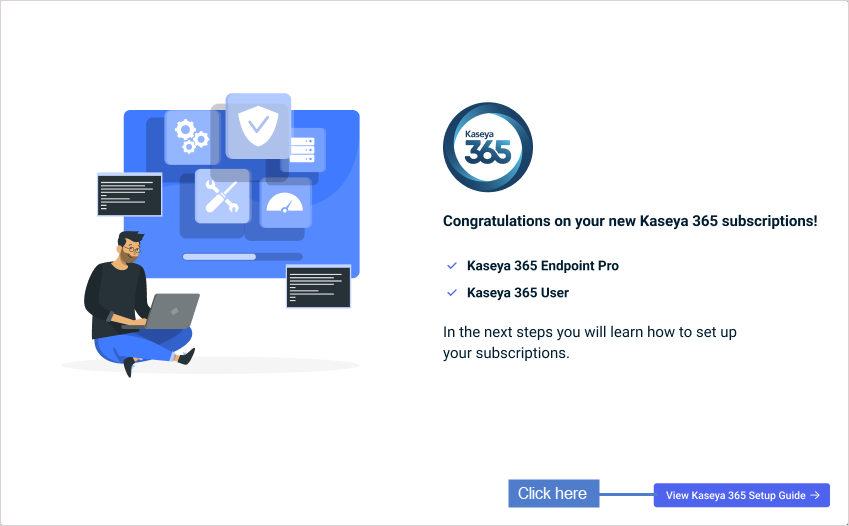
Welcome to Kaseya 365 Endpoint! After purchasing Kaseya 365, the subscription's implementation contact receives a Welcome to Kaseya 365 email within 48 hours of the subscription's start date. This email contains a link to the KaseyaOne portal— the central hub where you manage your subscriptions and access all of your Kaseya 365 modules.
To get started, access the Kaseya 365 Setup Guide page in KaseyaOne as described here:
-
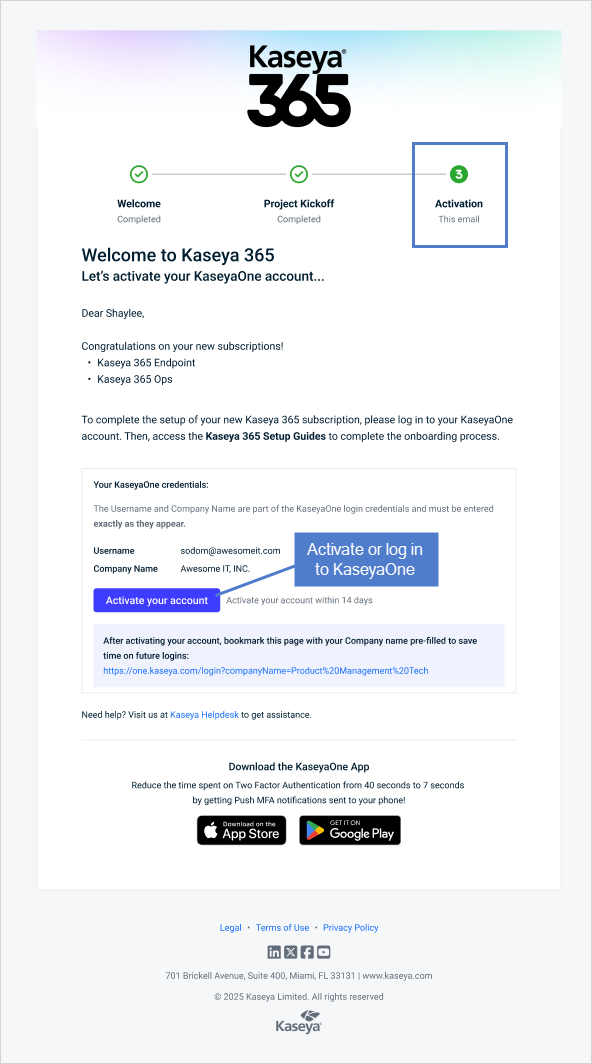
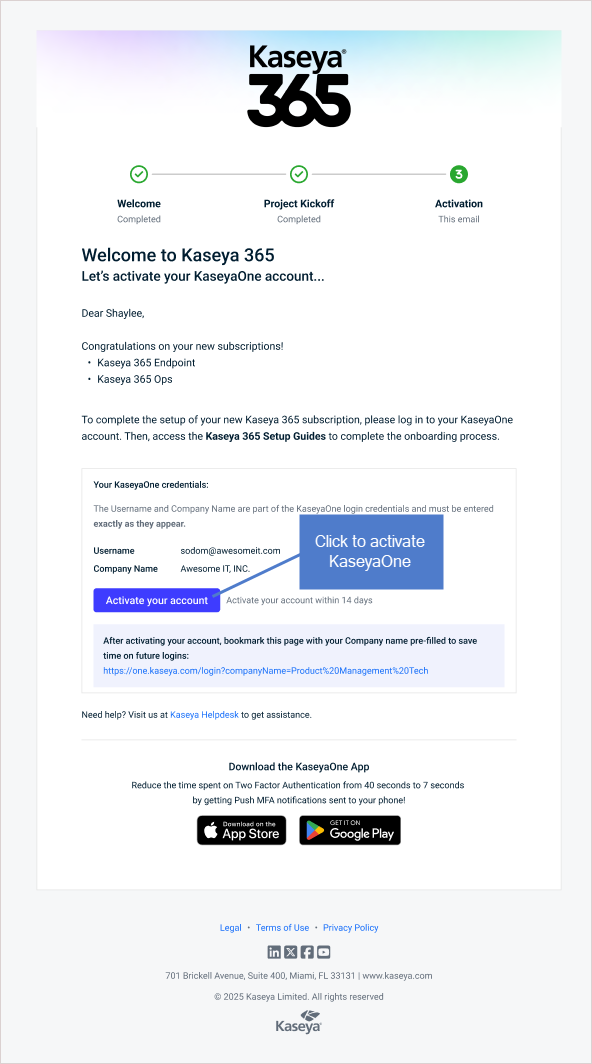
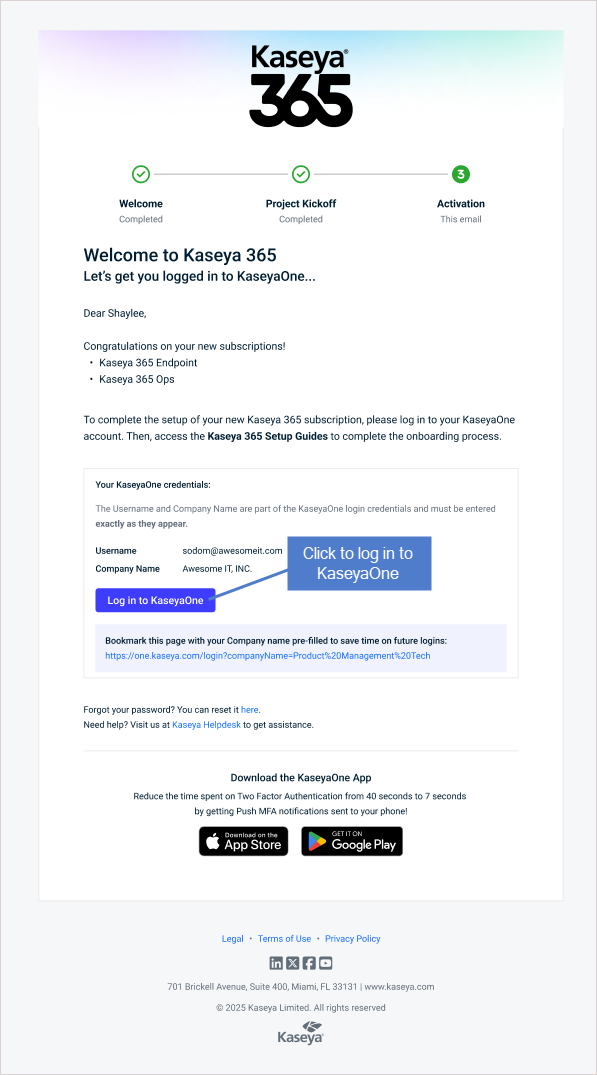
I'm the subscription's implementation contact: Access KaseyaOne from your Welcome to Kaseya 365 email by clicking Activate your account (new accounts) or Log in to KaseyaOne (existing accounts). You are directed to the Kaseya 365 Setup Guide page.
-
I'm a KaseyaOne Admin user for this subscription: If you have been added to this KaseyaOne account as a Admin user, you can also perform most of the setup tasks in this article. Simply log in to KaseyaOne and select Kaseya 365 Setup Guide in the left navigation menu.
- Step 1: Activate and log in to modules: Each new module has a designated implementation contact who must activate that module. All KaseyaOne Admin users can view this step in the guide, but functionality is limited if you are not the module’s designated implementation contact.
- Steps 2 and 3: Once new modules have been activated, any KaseyaOne Admin user can perform these onboarding steps for any module where they have an account with the highest privilege level (Admin, Superuser, Administrator, or Global Administrator).
The Kaseya 365 Setup Guide page walks you through the steps needed to start protecting your environment with your new subscription. Refer to the information in the rest of this article as you work through the steps in your subscription's Kaseya 365 Setup Guide.
- Your Kaseya 365 Setup Guide page contains activation links for new modules. These links expire within seven days of receiving the Welcome to Kaseya 365 email. Be sure to activate your modules before the links expire. (See Step 1: Activate and login to modules below for details.)
- If you need to purchase additional licenses, go to the Kaseya 365 Subscription tab on the Subscriptions page.
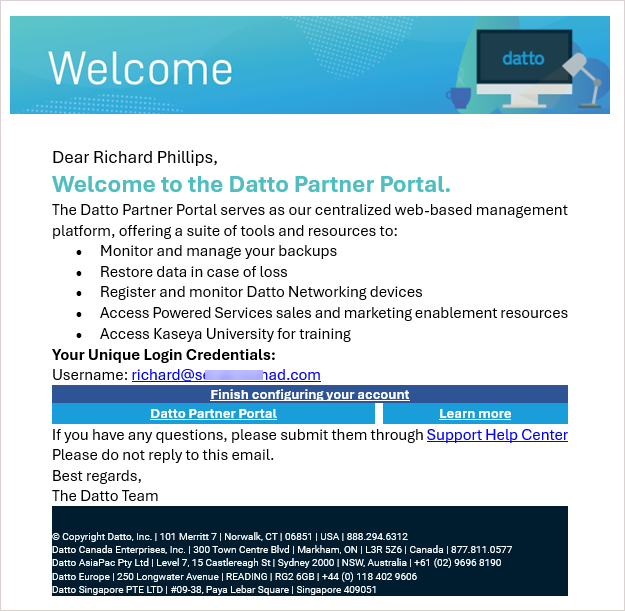
Your Kaseya 365 Endpoint subscription includes welcome emails that are sent to the subscription's implementation contact. See the following table for details about each welcome email, including when it is received, an example of the email message, and next steps.
| Email Subject | Description | Next Steps |
|---|---|---|
| Welcome to Kaseya 365 |
Used to activate or log in to KaseyaOne.
Sample emails: |
|
| Welcome to Datto Partner Portal |
Sample email: |
You can activate your Datto Partner Portal account from either of the following:
|
Welcome to UniView |
|
You can activate your UniView Portal account from either of the following:
|
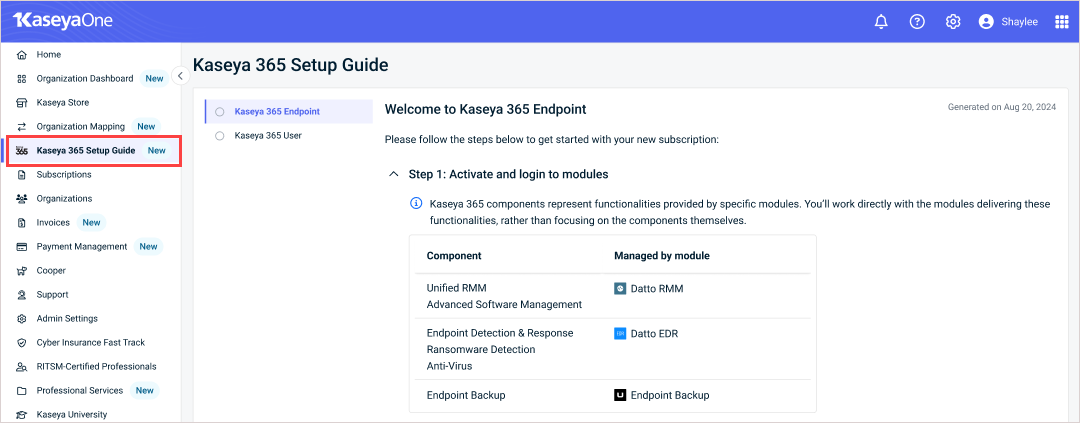
The Kaseya 365 Setup Guide page in KaseyaOne provides customized onboarding steps for each new Kaseya 365 subscription purchased for your KaseyaOne account. Click Kaseya 365 Endpoint to view the steps you will follow to set up your subscription.
Start by familiarizing yourself with your subscription by reviewing the included modules, shown in Step 1:
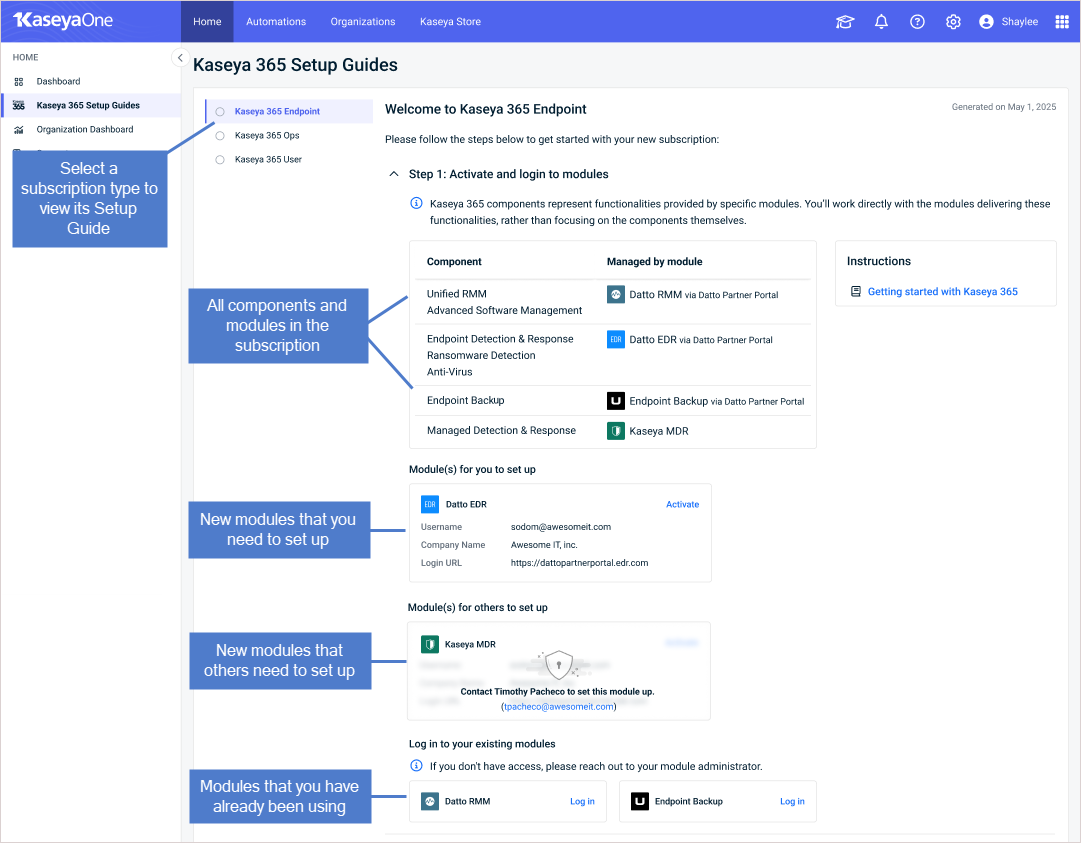
Your subscription includes a group of modules that power your Kaseya 365 components. These modules may have been newly provisioned for this subscription, may be existing modules that you have already been using, or a mix of both.
In this step, you will activate your new modules and log in to existing modules.
- The self-guided onboarding tour launches automatically the first time you log in to a module. After viewing a short video, dismiss the tour. You will launch the tour below in Step 3: Complete the Onboarding Tour for each module.
- To activate a new module, you will log in to the module's UI or Datto Partner Portal.
New modules
Modules that were newly provisioned for this subscription display in these sections under Step 1 on the Kaseya 365 Setup Guide page: Module(s) for you to set up and Module(s) for others to set up. Each new module must be set up by its designated implementation contact.
The Module(s) for you to set up section contains each new module that you need to set up, along with the username and company name you must enter to perform the activation. Activate each module displayed in this section, as described in the To activate a new module procedure below.
The Module(s) for others to set up section contains each new module that others need to set up. To get these modules set up, reach out to the designated implementation contacts using the emails that display for each module.
- In the Module(s) for you to set up section of the Kaseya 365 Setup Guide page, locate the module and click its Activate link. The module's Login page displays.
IMPORTANT If you are activating Endpoint Backup, do not click the Activate link. Instead, follow the instructions in this Endpoint Backup v2 article: Endpoint Backup v2 first time deployment.
- Activation link has expired: The activation link expires within seven days of receiving the Welcome to Kaseya 365 email. (This email is received by the subscription's implementation contact).
- Module has been activated: The activation link is designed to activate the module only. Once the module has been activated you can access the module through KaseyaOne Unified Login or directly by browsing to the URL displayed on your Kaseya 365 Setup Guide page.
- Other activation issues: In rare cases, the Activate link fails to connect to the module. If you experience this, support can quickly resolve the issue. Create a new support request through the Kaseya Helpdesk.
- On the module's Login page, enter the Username and Company Name that display for this module in the Module(s) for you to set up section, then follow the instructions for the page that you see when you log in.
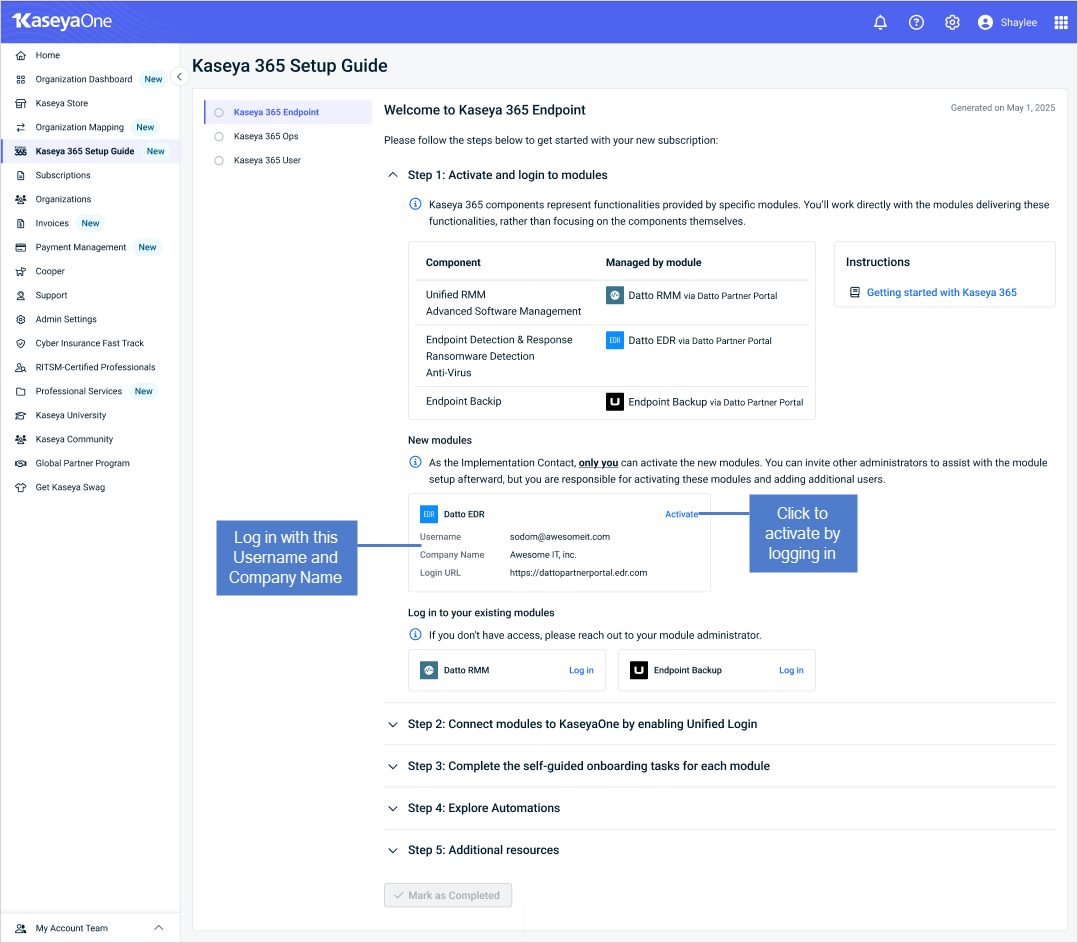
Existing modules
The Log in to your existing modules section of the Kaseya 365 Setup Guide page contains any modules that your company was already using (before purchasing this subscription). Simply click Log in and log in as you normally would.
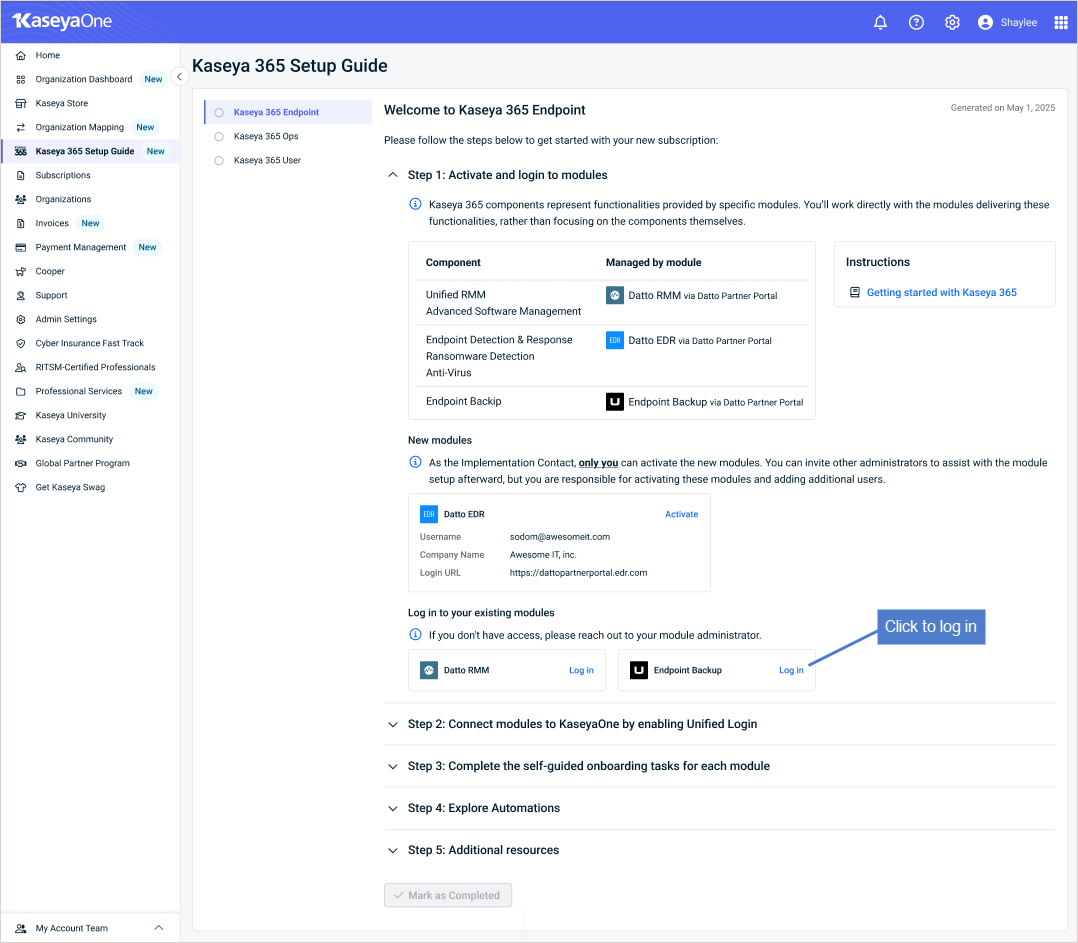
NOTE If needed, contact your module's administrator to request access to a module. You will need an account with the highest permission level (Admin, Superuser, Administrator, or Global Administrator).
In this step, you will configure KaseyaOne Unified Login for each module in your subscription. This connects your modules to KaseyaOne, so you can easily access these modules through the KaseyaOne portal. The benefits of using Unified Login include the following:
- Users need only remember one username and password.
- The process is streamlined and there is no need to re-enter passwords.
- Users can access their modules much faster, saving valuable time.
- Management costs are reduced since you have fewer user accounts and are likely to see fewer calls about forgotten passwords.
- Security is improved by mitigating the use of multiple and unauthorized accounts, and by restricting access using IP Access Control.
Step 2 shows each module and its KaseyaOne Unified Login status:
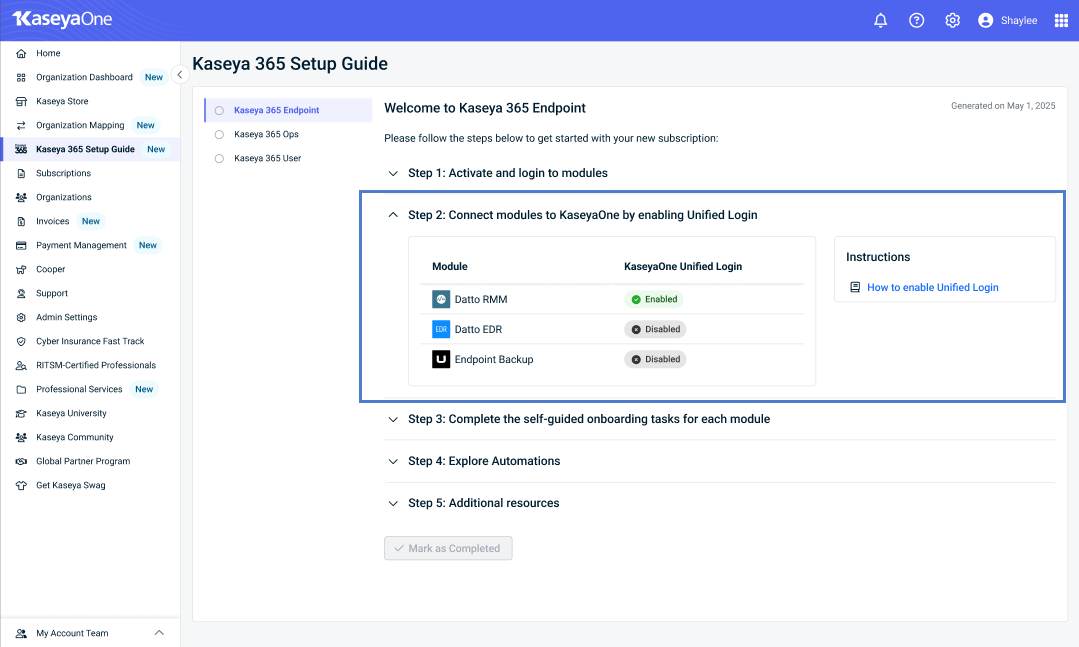
- Enabled indicates that Unified Login has already been configured. No further action is needed.
- Disabled indicates that Unified Login has not been configured.
See the table below for links to instructions on how to enable Unified Login for each of your modules. Upon clicking a link, the Enable Log In with KaseyaOne article opens in a separate tab. Simply return to this tab to continue to the next procedure.
| Module | Enable Log In with KaseyaOne procedure |
|---|---|
| Datto EDR | Enable Log In with KaseyaOne for Datto EDR |
| Endpoint Backup v2 (managed through UniView Portal) |
Enable Log In with KaseyaOne is enabled by default in UniView Portal.
NOTE Log In with KaseyaOne is on by default in UniView Portal, but may be disabled if you were an early user or a Superuser turned it off. See this procedure to check its status or enable it: Enable Log In with KaseyaOne for UniView Portal (for Datto Backup for Microsoft Entra ID, Endpoint Backup v2, Spanning, and Unitrends). |
| Datto RMM | Enable Log In with KaseyaOne for Datto RMM |
|
Kaseya MDR (Endpoint Pro only)
NOTE If you have an Endpoint Pro subscription with RocketCyber and have not yet enabled Unified Login, see Enable Log In with KaseyaOne for RocketCyber. |
Enable Log In with KaseyaOne for Kaseya MDR |
| VSA 10 | Enable Log In with KaseyaOne for VSA 10 |
| VSA 9 | Enable Log In with KaseyaOne for VSA 9 |
In this step you will complete the product onboarding for each module in your subscription.
Each module has in-product walkthroughs to support your self-guided onboarding. The onboarding tour launches automatically when you access the module for the first time— or access step-by-step onboarding any time from the Tasks tab of your onboarding menu. The Tasks tab is available through the help icon or the graduation cap icon, depending on the module: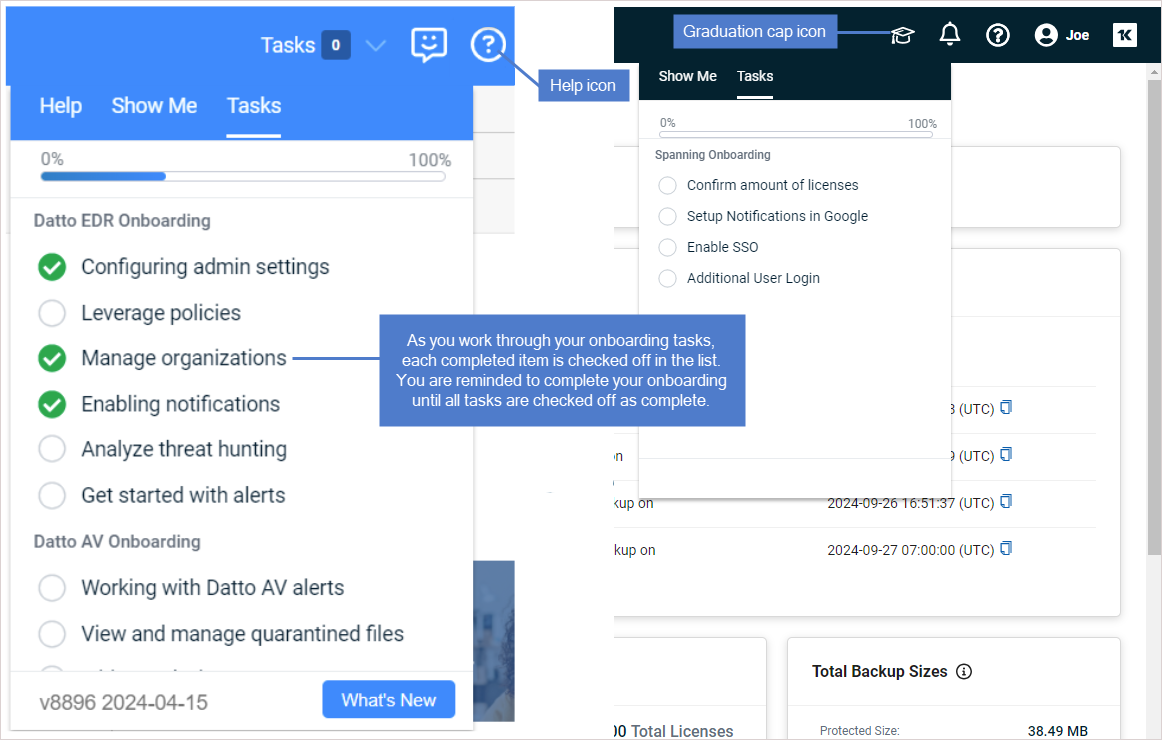
Complete the product onboarding for each module in your subscription by launching the onboarding tour and working through each task.
Go to Configuring Kaseya 365 Endpoint automations to set up automations for your subscription.
See these resources to get the most out of your subscription:
-
Explore automations to learn about additional integrations for your subscription
-
Learn more about Kaseya 365:
- Explore Kaseya University: Kaseya University home page and Kaseya University article
- Explore Professional Services: Professional Services page and Kaseya Professional Services article
- Register for Kaseya Elevate Live Learning Series webinars: Register now
-
Dive into the product documentation for your modules:


