Okta IdP SSO setup instructions
NAVIGATION Header > Admin Settings > Single Sign-On
PERMISSIONS Master role
Okta is a cloud-based identity management service that allows you to access applications with single sign-on. This article guides you through how to integrate KaseyaOne with Okta IdP. After successful integration, users will be able to access KaseyaOne from the Okta Portal or from the KaseyaOne login page using Okta credentials.
Supported features
-
IdP-initiated SSO
-
SP-initiated SSO
-
Just-in-time user provisioning (refer to Configure Enable Automatic User Creation for a third-party IdP SSO in KaseyaOne)
Prerequisites
-
Master user account in KaseyaOne and Administrator account in Okta
-
Users must have the same email address in KaseyaOne and Okta
Before starting, it is recommended that you open two tabs in your browser — one for KaseyaOne and one for the Okta Admin portal.
-
Open a browser and log in to KaseyaOne.
-
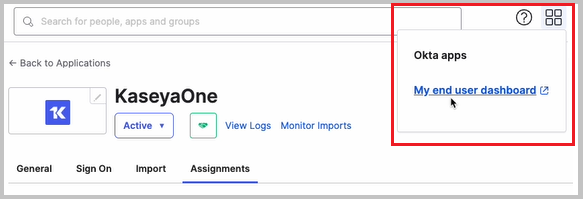
In a separate browser tab, log in to the Okta User Portal.
-
Click Admin in the header bar to go to the Admin portal.
-
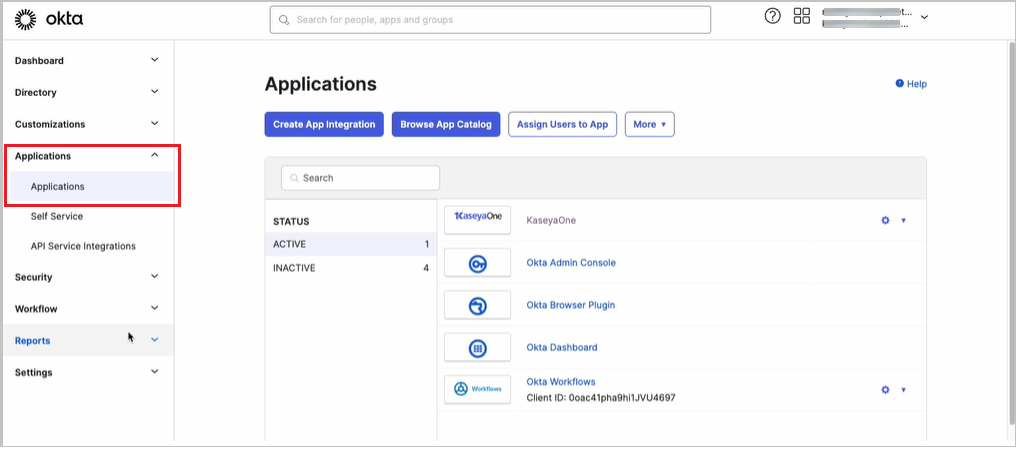
Click Applications > Applications on the left navigation menu and then click Browse App Catalog.
-
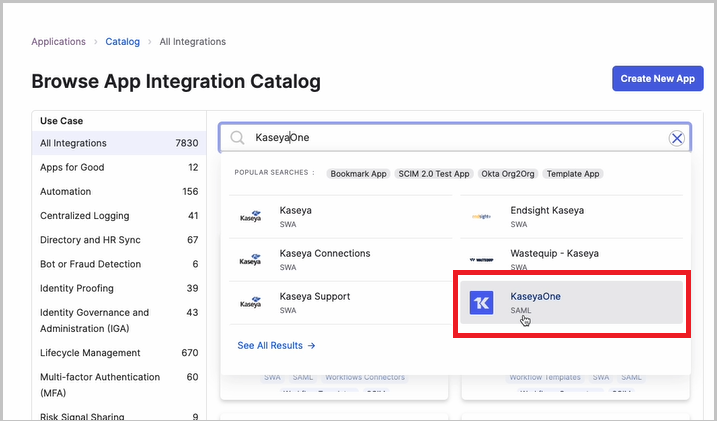
Search for the KaseyaOne application and then click on it to open it.
-
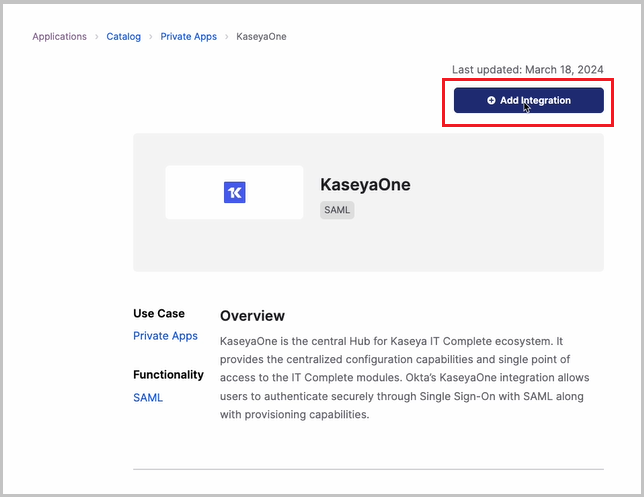
Click Add Integration:
-
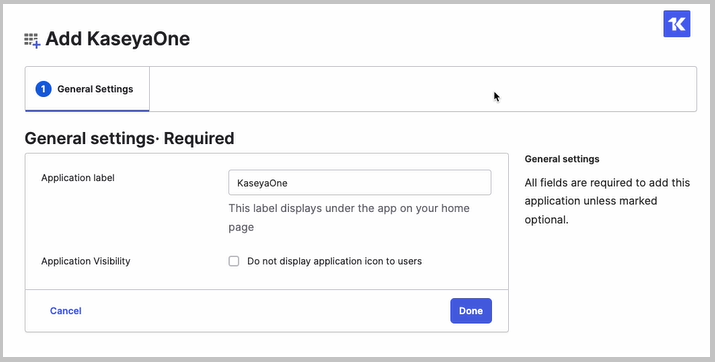
Click Done on the General Settings page - the Application label is already set to KaseyaOne.
-
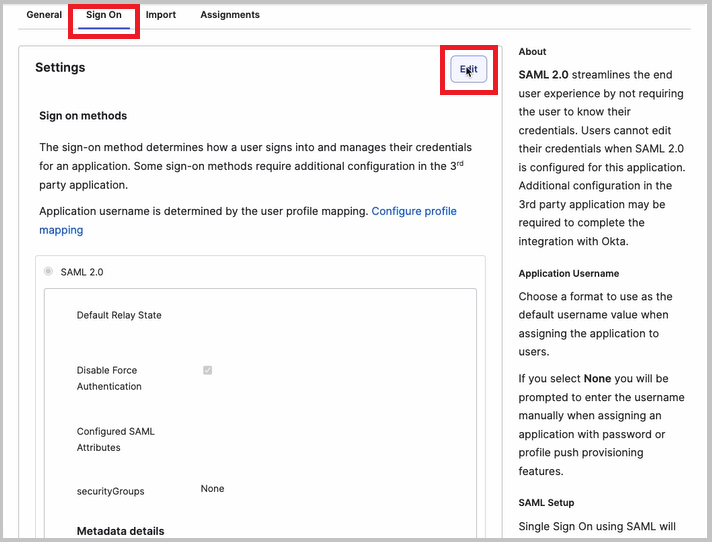
Go to the Sign On tab and click Edit.
-
Scroll down to the Advanced Sign-on Settings section and enter the KaseyaOne Company Identifier:
To obtain this identifier:
-
Go to the KaseyaOne tab in your browser, navigate to the Admin Settings > Single Sign-On view and copy the Company Identifier field value.
Example 1:
<8000000-00000-0000-00000000-00000000-0000-0000-0000-000000000000>
Example 2:<Organization-8000000-00000-0000-00000000-00000000-0000-0000-0000-000000000000> -
Go back to the Okta tab in your browser and paste the value in the corresponding field.
-
-
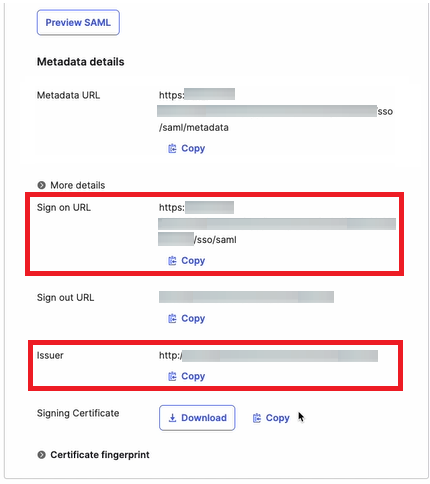
In the Metadata details section:
-
Copy the Sign on URL field value and do the following:
-
Copy the Issuer field value and do the following:
-
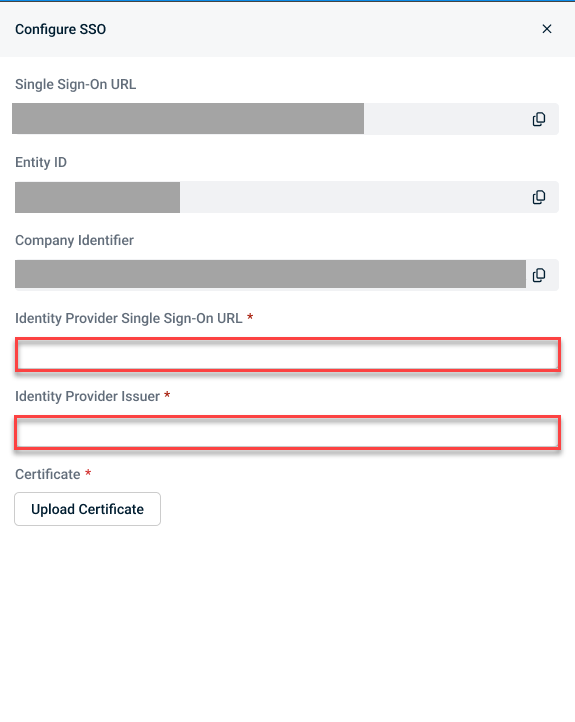
Go to the KaseyaOne tab in your browser and navigate to the Admin Settings > Single Sign-On view.
-
Paste the value into the Identity Provider Issuer field.
-
-
Download the Okta Signing Certificate.
-
-
Click Save when done to save the configuration settings.
-
Go to the KaseyaOne tab in your browser.
-
Upload Okta's IdP certificate that you downloaded in Step 1, #10.
-
Turn on the Enable Single Sign-On via SAML toggle to enable SSO integration.
-
Go back to the Okta tab in your browser.
-
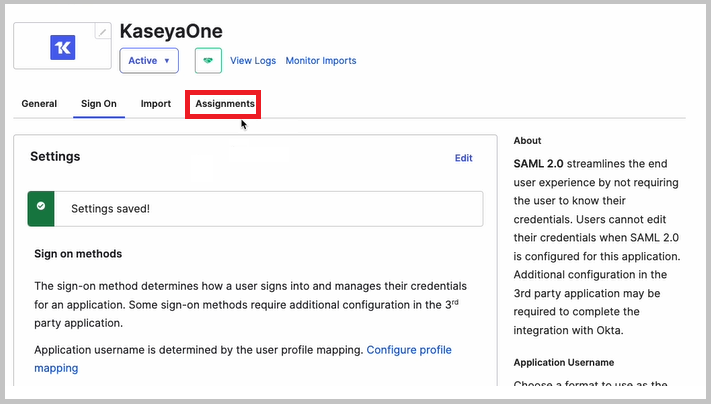
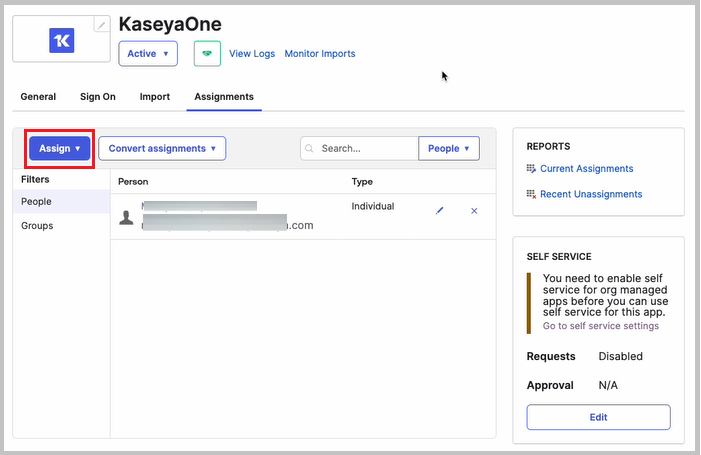
Go to the Assignments tab.
-
Click Assign > Assign to People to assign the KaseyaOne application to Okta users, OR
-
Click Assign > Assign to Groups to assign the KaseyaOne application to Okta groups if you have groups.
Users assigned must have the same email address in Okta and KaseyaOne to make SSO login work.
You can test your Okta SSO integration by logging in from either the Okta interface (IdP-initiated login) or the KaseyaOne login page (SP-initiated login).
-
Log out of KaseyaOne.
-
Log back in to KaseyaOne as follows:
-
Enter the Username and Company Name for your account and click Next.
-
Click Log In with Single Sign-On.
-
-
If already logged in to Okta (if you have an active browser session), verify that you are redirected to and logged in to KaseyaOne.
-
If not already logged in to Okta:
-
You will be redirected to the Okta login page — enter your credentials and complete the user login process.
-
Verify that you are redirected to and logged in to KaseyaOne.
-
Notes
-
Make sure that you enter the correct KaseyaOne Company Identifier value into the corresponding field under Advanced Sign-On Settings in the Okta Admin portal (refer to Step 1, #9). The wrong value prevents you from authenticating through SAML to your KaseyaOne account.
-
The supported SAML attributes are:
Name Value email user.email firstName user.firstName lastName user.lastName userName user.login securityGroups Matches regex: .* companyIdentifier Unique KaseyaOne account Identifier

