Automatic User Deprovisioning
PERMISSIONS In respective module: Master, Superuser, Administrator, Global Administrator, Security Admin (Datto Partner Portal)
Instructions follow on how to set up just-in-time user deprovisioning for a module. You set up just-in-time user deprovisioning for a module by configuring Automatic User Deprovisioning from within the individual module.
-
If you enable Automatic User Deprovisioning, then just-in-time user deprovisioning will be allowed for the module as follows:
-
Module users will be deactivated or deleted when they are deactivated or deleted in KaseyaOne.
-
Module users will be disabled if deleting users is not an option in the module.
-
Module user accounts will be deactivated when KaseyaOne users lose access to the module.
-
-
If you disable Automatic User Deprovisioning, then you must manually deactivate or delete/disable module users whenever they are deactivated or deleted in KaseyaOne.
Enable Automatic User Deprovisioning from individual modules
Instructions to configure Automatic User Deprovisioning from individual modules follow. This feature is supported in certain modules only.
To enable Automatic User Deprovisioning for BMS/Vorex, do the following:
- Log in to BMS in the usual way and from the home page, navigate to Admin > My Company > KaseyaOne Settings.
- Turn on the toggle under Automatic User Deprovisioning to enable the feature.
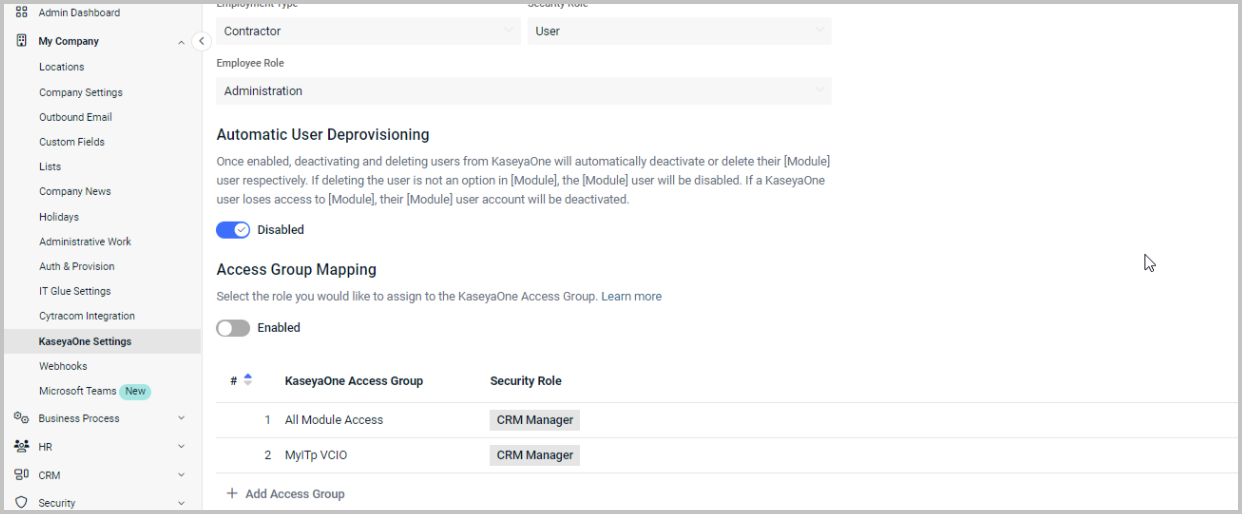
- Click Save.
When a user created in KaseyaOne is deactivated or deleted, that user will now be deactivated or deleted in BMS/Vorex.
For more information, refer to KaseyaOne Settings: JIT in the BMS/Vorex Help.
To enable Automatic User Deprovisioning for BullPhish ID, do the following:
- Log in to BullPhish ID and on your Organization's dashboard, click Settings. The Settings page opens with the KaseyaOne tab selected. In the Unified Login section, make sure that the Enable Log In with KaseyaOne toggle is turned on.

- In the Automatic User Deprovisioning section, turn on Enable Automatic User Deprovisioning.

When a user created in KaseyaOne is deactivated or deleted, that user will now be deactivated or deleted in BullPhish ID
For more information, refer to Enabling automatic user deprovisioning in the BullPhish ID Help.
To enable Automatic User Deprovisioning for ConnectBooster, do the following:
- Log in to ConnectBooster and click Configurations > KaseyaOne on the left navigation menu.
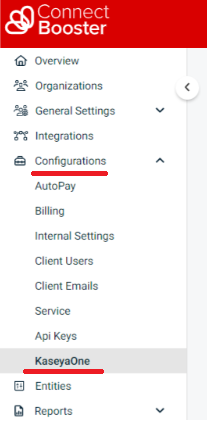
- In the Automatic User Deprovisioning section, turn on the Enable Automatic User Deprovisioning.

For more information, refer to Associate your ConnectBooster and KaseyaOne Accounts in the ConnectBooster Help.
To enable Automatic User Deprovisioning for Datto Partner Portal, do the following:
- Log in to the Datto Partner Portal and navigate to Admin > Security Settings.

NOTE You must be assigned the Security Admin role to see and access the Security Settings menu.
- Go to the Single Sign-on (SSO) section of the page that shows the KaseyaOne logo and make sure that KaseyaOne SSO is enabled.
- In the Automatic User Deactivation section, turn on the Enable Automatic User Deactivation toggle to enable the feature.
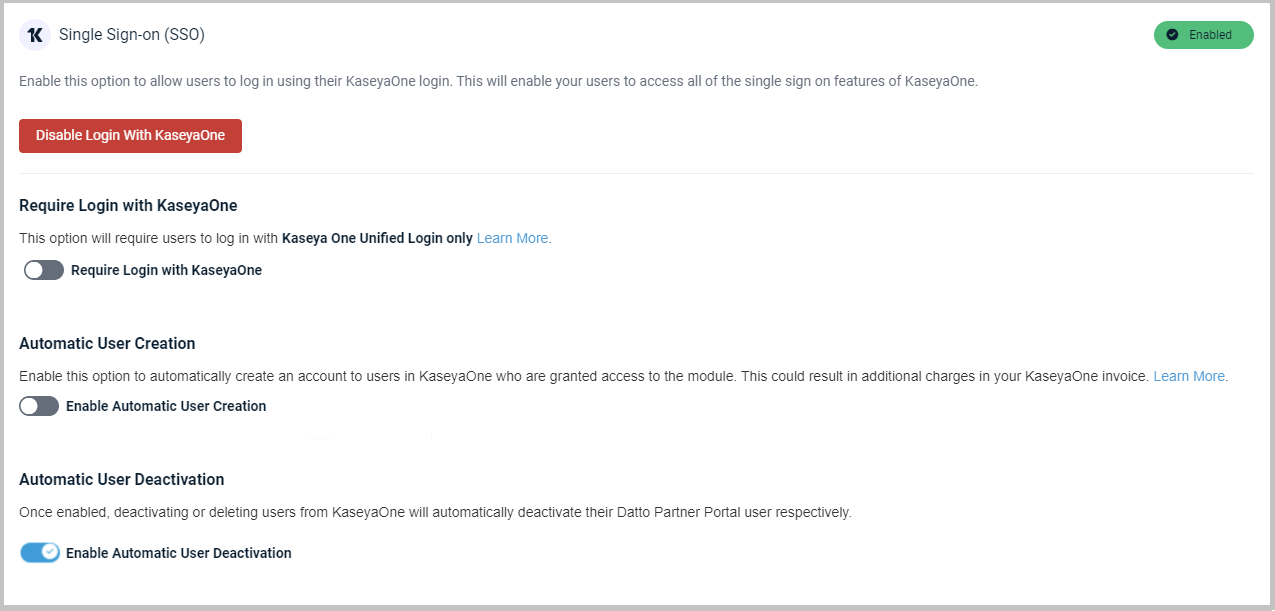
- Click Save.
When a user created in KaseyaOne is deactivated or deleted, that user will now be deactivated or deleted in the Datto Partner Portal.
For more information, refer to KaseyaOne integration with Datto Partner Portal in the Datto Partner Portal Help.
To enable Automatic User Deprovisioning for Datto File Protection, do the following:
- Log in to Datto File Protection in the usual way.
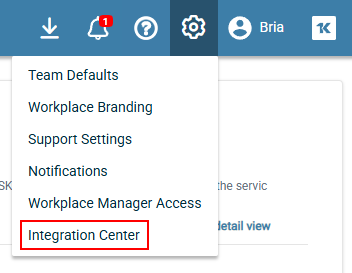
- Go to the Settings menu and select Integration Center.
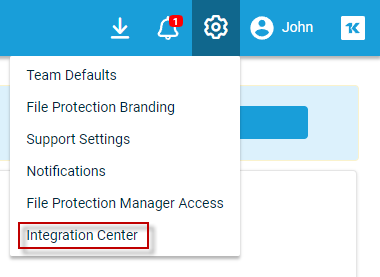
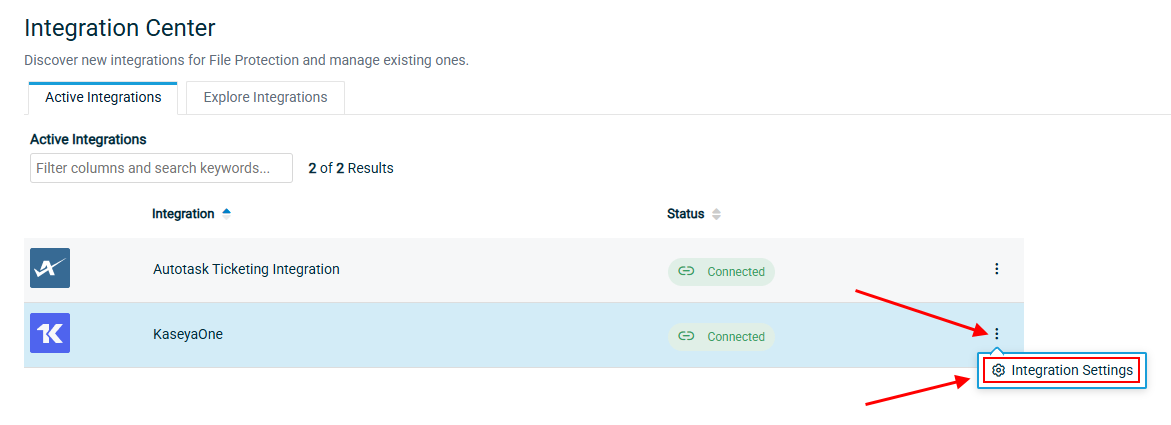
- Go to the Active Integrations tab, click the options menu and select Integration Settings.
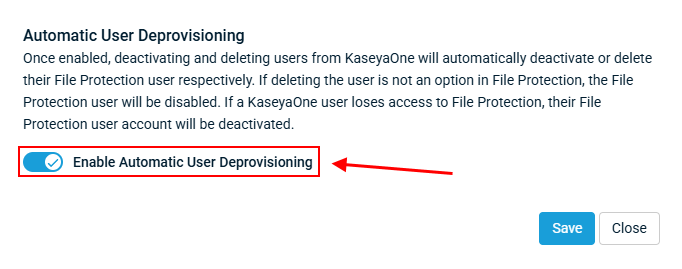
- Turn on the Enable Automatic User Deprovisioning toggle.
- Click Save.
For more information, refer to KaseyaOne Unified Login in the Datto File Protection Manager Help.
To enable Automatic User Deprovisioning for Datto RMM, do the following:
- Log in to Datto RMM in the usual way and navigate to Setup > Integrations > KaseyaOne.
- Turn on the Enable Automatic User Deprovisioning toggle to allow just-in-time user deprovisioning for Datto RMM.

IMPORTANT Even if a user is not required to log in via KaseyaOne and this feature is enabled, their Datto RMM user account will be deleted or deactivated when their KaseyaOne user account is deleted or deactivated.
For more information, refer to Unified Login with KaseyaOne in the Datto RMM Help.
To enable Automatic User Deprovisioning for Datto File Protection, do the following:
- Log in to Datto File Protection in the usual way.
- Go to the Settings menu and select Integration Center.
- Go to the Active Integrations tab, click the options menu and select Integration Settings.
- Turn on the Enable Automatic User Deprovisioning toggle.
- Click Save.
For more information, refer to KaseyaOne Unified Login in the Datto Workplace Manager Help.
To enable Automatic User Deprovisioning for Graphus, do the following:
- Log in to Graphus in the usual way.
- Click MSP Administration on the top menu and then click KaseyaOne on the left navigation menu.
- In the Unified Login section, make sure Enable Log In with KaseyaOne is turned on.
- In the Central User Management section, turn on Enable Automatic User Deprovisioning.
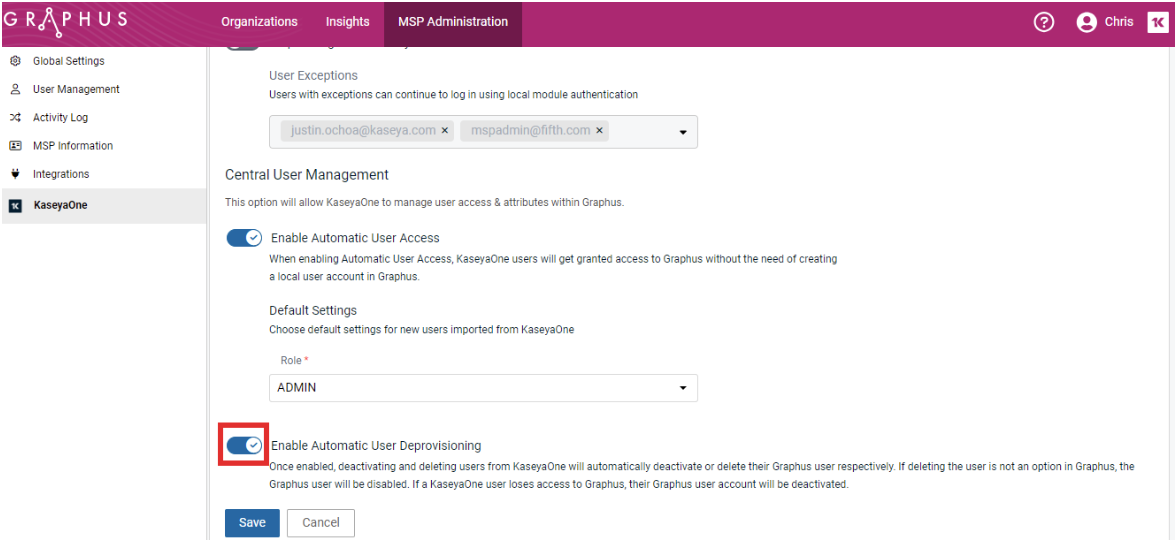
When a user created in KaseyaOne is deactivated or deleted, that user will now be deactivated or deleted in Graphus.
-
Click Save.
For more information, refer to Set up Automatic User Deprovisioning with KaseyaOne for Graphus in the Graphus Help.
To enable Automatic User Deprovisioning for UniView, do the following:
- Log in to the UniView Portal as a superuser in the usual way and click the cogwheel icon on the application banner.

- Go to the Integrations tab, locate the KaseyaOne integration and click Show configuration.

- Go to the Automatic User Deprovisioning section and turn on the Enable Automatic User Deprovisioning toggle to enable the feature.
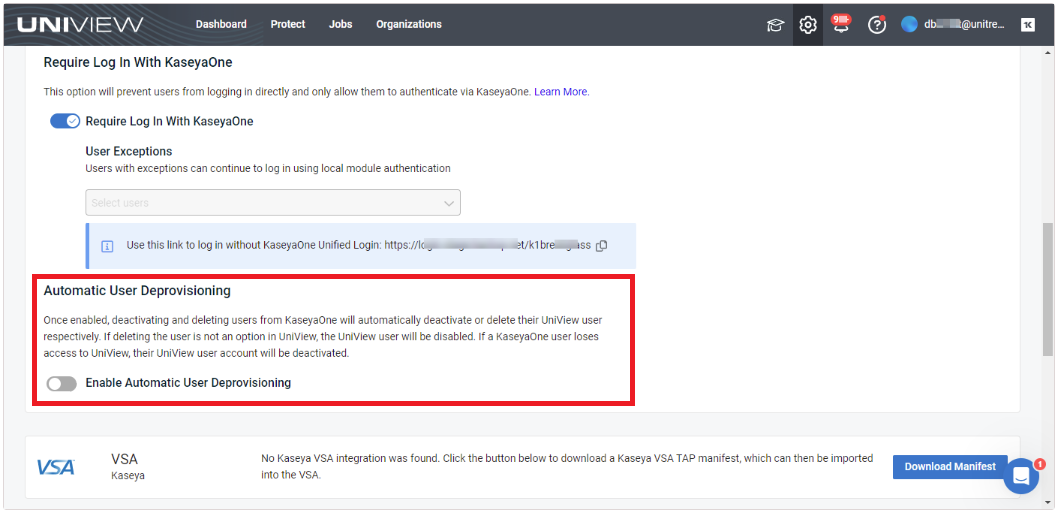
For more information, refer to the UniView Portal Guide.
To enable Automatic User Deprovisioning for vPenTest, do the following:
- Log in to vPenTest.
- Click Global Options in the left navigation menu and select the KaseyaOne tab.

- In the Automatic User Deprovisioning section, turn on the Automatic User Deprovisioning toggle.
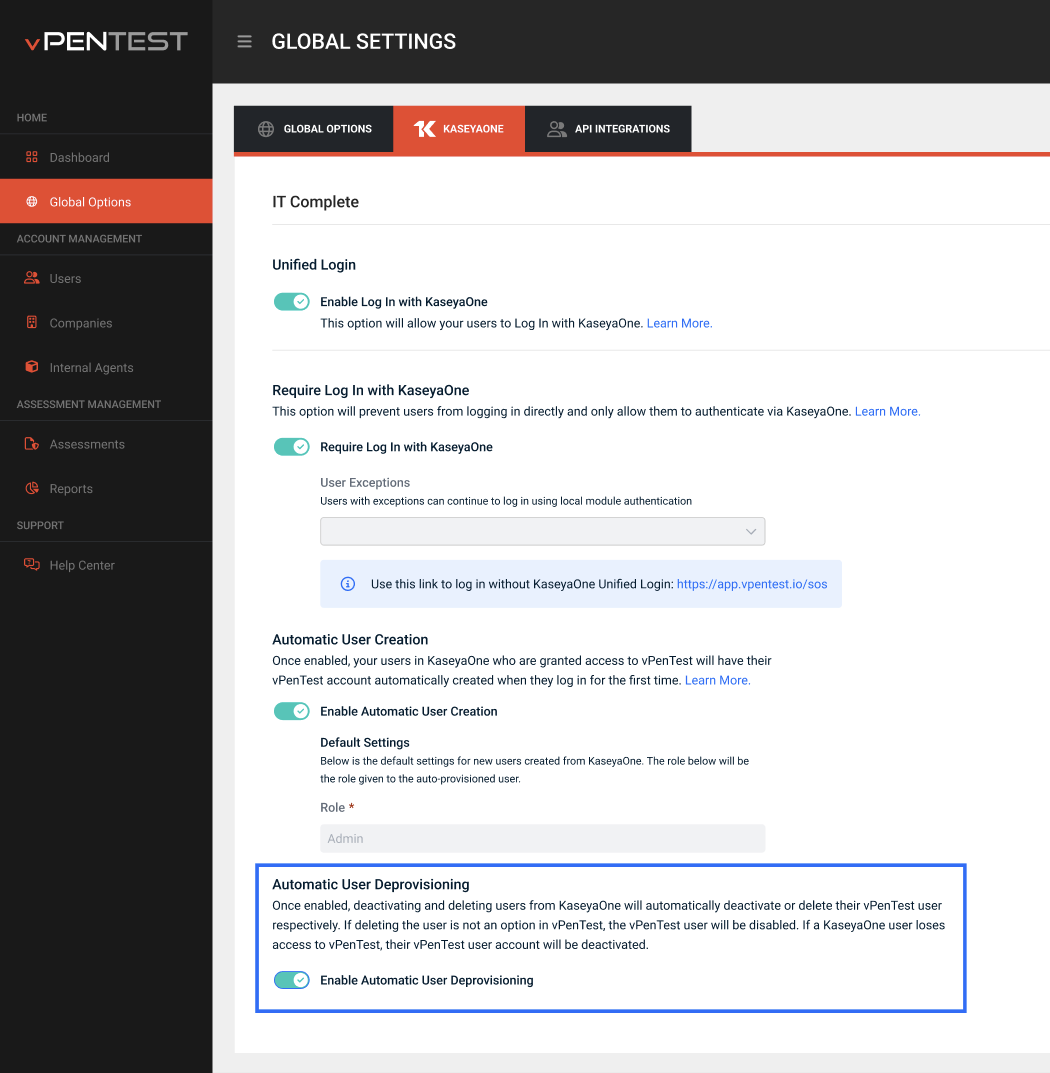
When a user created in KaseyaOne is deactivated or deleted, that user will now be deactivated or deleted in vPenTest.
For more information, refer to Automatic User Deprovisioning in the Vonahi Help.
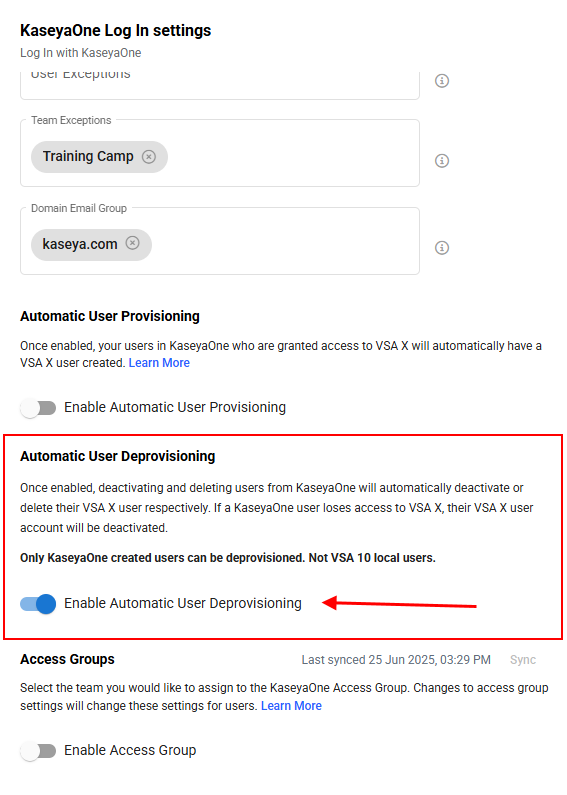
To enable Automatic User Deprovisioning for VSA 10, do the following:
- Log in to VSA 10 in the usual way.
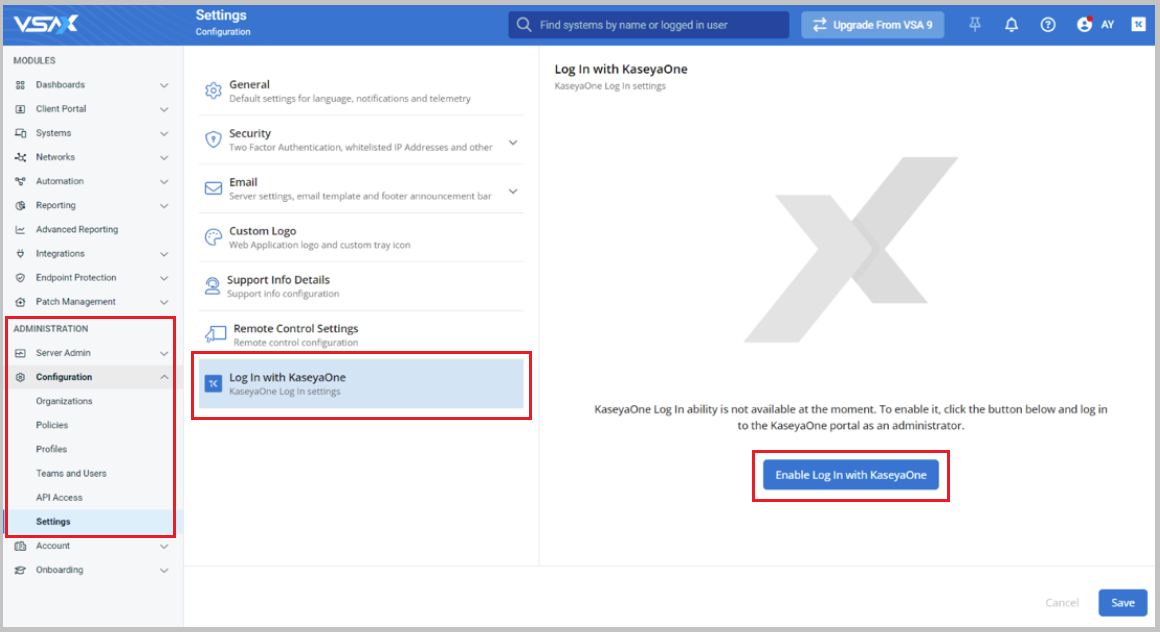
- Navigate to Administration > Configuration > Settings on the left navigation menu and select KaseyaOne Log In Settings.
-
Under Automatic User Deprovisioning, turn on the Enable Automatic User Deprovisioning toggle.
-
Click Save.
For more information, refer to Unified Login with KaseyaOne in the VSA 10 Help.
